First coat

This morning, I applied the first coat of spray-on rubber to the legs of the picnic table, and the cracks on the rain barrel.

This is the product I am using.

I have never used this stuff, or this brand, before. It was the only one on the shelf, so it’s not like I had a choice of brands or product versions. I think it will work just fine.

The first time we used a product like this, it was a can of liquid rubber deep enough to dip things directly onto. Like the handles of tools. Which is what we did at the time. Or it could be brushed onto a surface. The first time we tried a spray, it was basically the same product as an aerosol. My husband used it to coat the handle of one of his canes (made with aircraft grade aluminum, that could also be used for self defense), and to a cord wrapping he added to parts of his walker for extra support to hold the weight of the backpack he has hung on it. For the can, a dip version would have done a better job, but as a spray, it worked very well on the uneven surface created by the rope work. It’s still holding out, and it’s been about 5 years.

So that was basically what I was expecting. Black, spray on rubber.

Nope.

It’s white.

At least it looks white against the blue paint.

It’s also a lot lighter and thinner than I expected. Which I suppose is exactly what I need to fill in all those crevices. I added extra along the part where the most rotted wood had come off on the one leg.

I probably could have applied it more carefully to avoid drips, but there is no aesthetic requirement on this.

On the rain barrel, it looks a bit different. The barrel got sprayed both inside and out.

Here, you can see it has an almost blue tint to it. Depending on the angle, it looked a bit more purple than blue.

It should be interesting to see how it looks when it’s done.

How many layers we put on will depend on how well it coats. It requires at least 2 hours between coats. Depending on how often someone can get outside to add another coat, this may take a day or two! It then needs at least 4 hours of curing time after the final coat for the coated object can be used. Thankfully, these are not things we need to use, quickly.

The Re-Farmer

Blue

When I got back from the city with our new washing machine, I just had to go around back to see how the painting went for the girls.

The first coat of paint is done!

You know, when I first picked up this shade, I was afraid that once it was on large surfaces like this, it would be too much. I’m happy to say that, now that I see it, I’m loving it even more!

The bird feeder had also been started.

Since these photos were taken, the girls were able to go back and do another coat on the picnic table, then flip the bird feeder to finish the rest of the top side and give the roof a second coat.

I might have to get another can of this paint! The window frame for the basement screened window didn’t get done, but that’s okay. There is no rush on that. We’re also going to wait for the paint to fully cure before we add the spray on rubber stuff for the bottoms of the picnic table legs. Since they’ve already been painted, there’s no rush on that, either.

These are going to look great, once they’re done and set up in the yard!

The Re-Farmer
Picnic table progress: painting started

While the tech was here to try and figure out why our secondary internet account wasn’t working (more about that on another post), my daughter and I got started on the scrubbed and fully dry picnic table.

First, we set up her tent!

Once we moved it over the table, she got the paint ready while I pegged down the legs.

Well.

Tried do.

I was able to get only 1 leg properly pegged down. With the others, it didn’t matter what angles I tried, I kept hitting rocks!

Hopefully, it’ll be enough to keep it down if we get any winds.

Even if we don’t end up getting rain, it provided much appreciated shade!

Since it’s the underside, we weren’t too worried about complete coverage, except for the ends of the legs. Those might even get a second coat before we flip it.

I’m really glad we had those chimney liners to use to raise it off the ground. They really made the job easier! Amazing what a difference just those few inches makes, on preventing back strain.

The colour darkens a bit as it dries, but it’s still really, really bright!

Of all the things we need to work on, this small project is something that will be done fairly quickly. It’s a psychological thing. Once it’s done and set up, we’ll be able to see this one bright object in the yard that is a thing that we actually finished. So many other things have been delayed, or are things that will be worked on over years, not days, or even months.

I really look forward to using it when it’s done! :-)

The Re-Farmer

A little bit of progress

First, the cute stuff!

Beep Beep is such a good mama!

The kittens have taken to napping under the couch regularly. Beep Beep can just barely squeeze under there, herself. A little while ago, my daughter saw her squeeze part way there, then start wiggling oddly. Moments later, some sleepy kitties came out. She then flopped on the floor for them to nurse. She actually woke them up for lunch! :-D They’re more than old enough to be weaned, but it’s still great bonding time. :-)

My daughter got the broken flexible pipe replaced. She did just the one for now.

The other has been left for now, partly to make sure the cold water is working fine and there are no leaks. With the hot water, there is at least a shut off valve at the hot water tank. When we replaced the tank shortly after moving here, the plumber added one on for us. When it’s time to replace the other piece, only the hot water to the house will need to be shut off, and not all the water.

For some reason, the copper pipes are painted, including the end of the flexible hose. My daughter tells me the pipes to the old sink in the entry way, which now supply water to the washing machine, were also painted.

Why paint copper??

As for me, I headed outside for a last bit of mowing.

That’s 4 days of mowing, now, and I’m skipping some places!

I did do an extra bit, though.

I mowed a path to and around the old Farm Hand tractor. Next, we’ll be going in there with the weed trimmer. Once we can access the tractor, we need to cut away the trees that are growing through it. We aren’t able to maintain the tractor itself, but we can at least prevent some types of damage to it!

For the last couple of summers, I’d been able to keep an area to the back gate mowed, large enough to drive through. This year, between the rain and the heat, I just never made it that far.

Today, after mowing the area in front of the storage shed, I decided to mow a path to the back gate. It’s our “emergency exit”, so I don’t want to leave it entirely.

A path, however, is all I was up to!

I cranked the mower up as high as it can go – which is higher than the riding mower can go – and only managed a path twice the width of the mower itself. I actually took 8 passes, just to get it as good as this! The first pass, I had the front wheels up almost the whole way, just to get the height down enough to not choke out the mower.

My daughter suggested it would probably be easier to use the old scythe in the garden shed, instead of a mower, for this stuff! She’s probably right. This is hay that’s being cut! Heck, if we had the equipment (well… working equipment), we could probably get a couple of large round bales just in this section! :-D

I’m hoping to at least keep up a path to the back gate. I don’t expect to make the wide “driveway” I’d kept clear last year. I’d hoped to do more, since the area becomes quite the fire hazard, but we just can’t keep up with it all. More time is being spent on the lawn than anything else right now. As much as I love mowing the lawn, there are other things that need to get done! Ultimately, the goal is to have less lawn, with trees in some areas, and raised garden beds in others. Maybe even a greenhouse or two. Other areas, I hope to replace the grass with moss.

Until then, though, there’s an awful lot of grass to cut!

One of the things that is quite visible when the grass is tall, is a path through the grass, worn down by cats, leading from the yard to under the storage shed. While I was working on the path to the back gate, and was turning to make another pass, I noticed Junk Pile cat, sitting in the newly mowed grass in the shade of the shed, watching me. I think her kittens might be under there. When I told my daughter about it, she said she saw them this morning! Junk Pile cat had brought them to the house for food. :-)

I look forward to seeing them more often and, hopefully, being able to socialize them at least a bit. And their mom, too!

The Re-Farmer

Carving progress: it’s finished!

I am happy to say that I have finally finished my first attempt at carving!

Yay!

My trip into town was successful, in that I found a teeny tiny tip for my Dremel.

Saffron made sure to check it out, too!

I discovered something when I went to put it on my Dremel, though.

It didn’t fit.

The shaft is too small. By maybe a millimeter!

Well, it’s an engraving tip, and I have an engraving tool, so I got that out.

That one was even worse!

What to do? I wasn’t going to take it back. Not only did I have to destroy the packaging just to open it, it was the ONLY tip they had that was small enough for what I needed.

Painters tape to the rescue!

I got it on, and it was secure. Perfect!

After making a few practice passes on the piece of lilac I’d practiced the carving knives on, I started using it on the morel.

This is how it looked, immediately after I finished (and you can see the tape that allowed the tip to fit). I was really happy with this tip. It was exactly what I needed for the job. If anything, I would have gone even smaller, if I could!

While certainly better than the carving knives, it was still rather messy. Sanding it did take care of some of that.

I have sandpaper only up to 220 grit, which is adequate for the job. No way to get into the holes, though, which is okay. I wasn’t done with it.

The next step was to break out the wood burning kit. The kit has a very fine pointed tip that I used to burn inside each hole in the morel. This allowed me to also burn away any ragged bits.

Once the insides of the holes were done, I could use the side of the tool to burn the flat surfaces.

Here is how it looked, once done.

The only thing to do after this is to oil it!

Two Face decided to “help”. :-D

Here is the completed spoon.

For the mushroom, I basically poured the mineral oil over it, to get into all the crevices, then used a paper towel to apply oil to the rest. At this point, I will let it sit for a day or two, then see if it needs more oil. I’ve seen sites that recommend putting small things like spoons into a slide-lock bag with oil, making sure the air is all squeezed out, and the item is in contact with oil all over, then leaving it for several days. I might try that with future projects, but I think just a light coating of oil is adequate for this one.

I am really happy with how this turned out!

I feel much more encouraged about tackling some of the wood I’ve salvaged lately. :-) I think my next projects, though, will be spreaders.

No bowls to hollow out! :-D

The Re-Farmer

Clean up: more progress

Today, I had a chance to work on cleaning up one of the areas around where we are planning to build a cordwood outhouse.

Here is how it looked, when we left off last.

Basically, I’d managed to clear around an old tree stump, and not much else, before being driven indoors by the heat.

This time, I brought out the reciprocating saw to take down some of the larger things, including cutting the stumps of what I’d cleared before, to ground level.

One of the issues we have with using the outside plug is, even the weight of the cord itself tends to pulled it out enough to kill the power.

Today, I tried a solution that worked out just fine.

This pole used to have a bird feeder on it. I took the feeder off to repair it, but with the lilac growing over it, I don’t see use putting it back in this location again. At some point, we’ll pull it out, but for now, it’s coming in handy! :-D

Here is how the area I worked on looks now.

The branches in front, on top of a stump, are for the chipping/burn pile. I cleared as far back as the next stump.

This turned out to be a very finicky job. I kept having to pull things out by hand, like crab grass and small saplings growing out the roots of things I’d cut away last year, then raking out debris, just to get at the larger things I needed to cut down.

I cleared only a little bit, towards a stump we uncovered while clearing this area last year.

In the process, I uncovered a bunch of flowers. I don’t know what they’re called, but I’m finding them kind of all over the place.

I also uncovered these.

There are quite a lot of these very delicate little wildflowers! I tried not to pull any up as I cleared debris from around them.

Further in is where more cherry trees are. None of which have bloomed, that I ever saw. You can see on the right of this photo, the cherry trees that were killed off last spring, when we had a sudden drop in temperatures after they started blooming. They got fresh growth from their bases. I think I have identified one or two in this area that look like they are strong and healthy enough to keep. The rest will be taken out.

Meanwhile, covering the left half of the photo, berries are starting to form on what I believe are chokecherries!

These are pieces of cherry wood that I will be keeping for future projects.

This is the pile of debris I cleared away from that small area!

We’ve started a pile behind the old outhouse, of what is turning out to be a tree debris compost pile. Stuff that we don’t want to add to the chipping/burning piles, but that don’t belong in the compost pile, either.

When we get to the point where we will be building accessible raised bed gardens, debris like this will be used on the bottoms of the beds to help fill them.

It’s remarkable how much stuff came out of such a small area!

When next I work on this area, I want to start on the other side of where we want to put the cordwood outhouse, clearing more towards the junk/wood pile. There’s at least one old tree stump in there, plus fallen trees that need to be cleared out.

Those might end up being part of the walls of the outhouse! :-)

I’d like to be able to access the junk pile better, so we can go through it and see what wood in there can be salvaged, what needs to be added to the debris pile, and what needs to go into the junk pile that will be hauled to the dump.

There are two Saskatoons and an elm growing on that side. We’ll have to decide which, if any or all, of these will be kept.

There’s also a mound of… soil? beside it. I’d like to get rid of it, but it’s got a layer of grasses growing on it right now, so I can’t tell what it’s actually made up of. The other mystery pile out by the barn turned out to be a pile of insulation. I’m kind hoping this one is something like gravel, or even just dirt.

The goal at this point, though, it just to clear access to the junk pile, then get back to clearing the space the outhouse will be built on, and start clearing out the sod.

I’m happy to have gotten at least a little bit or progress in there today!

The Re-Farmer

Outer yard progress: more reclaimed

My plans to continue mowing and, hopefully, reclaiming more overgrown areas nice and early got delayed a bit. We had an unusually heavy dew this morning, and cooler temperatures kept it from evaporating until well into the afternoon.

However, progress was made!

Remember this area?

I hiked up the lawnmower, and was able to clear the area all the way to the storage building around behind the pump shack that’s in the photo.

Eventually, I will continue on beyond this, making access to the back gate, but for today, I focused on the area around the maples.

The last time any of this area was NOT overgrown was when the renter’s cows discovered his electric fence wasn’t working, and broke through.

Two years ago.

By the time they finished grazing, the entire outer yard looked awesome! :-D

When I was a kid, the fence to the inner yard at this location was on the other side of the maple trees. There was a small gate near the pump shack, for when we went to get water for the house, or took baths with water heated on a wood burning cookstove that used to be in there. When the chain link fence was installed, it was done in a straight line, rather than turning a corner to include the trees.

I miss having a gate there!

I had to be really careful working through here. I’ve tried to keep up on removing any fallen branches over the past couple of years, but knew there had to be more, hidden in the tall grass. Plus, who knows what else would show up.

Like the lone brick I found, half buried in the dirt.

Thankfully, raising the lawnmower meant I didn’t hit many of the larger buried branches, like the one in the photo above, that I pulled out of the thatch.

It’s only a start. We’ll have to go through the area to clear out any other branches and whatnot that is still buried in there, prune back the trees (there is now lilac growing in the space we used to walk through to get to the pump shack), and get in there with a weed trimmer. Some of the trees have fence wire around them, though one of them is just a stump that has some suckers growing out of it. Since we don’t have to protect the trees from cows, I want to clear away the wire, and salvage it for something else.

I’ve been wanting to get into this area for the last two summers! It feels so good to finally start cleaning it up. :-)

The Re-Farmer

Garden progress: setting up for sunflowers

The winds finally died down today, and we were able to prep for the giant sunflowers we will be planting.

To recap, these are being planted for several reasons. One is to have seeds for the birds over the winter (and for ourselves, if we want). Another is to create a wind break and privacy screen at the far end of the old garden area. A potential bonus is that sunflowers are supposed to be good for improving soil, and the area can use all the improvement it can get!

Normally, like anything else grown from seed, the sunflowers would be planted closer together, then thinned out after they germinate. For these giant varieties, they would be thinned out to 2 feet apart.

We’re not going to do that.

I counted the seeds in the packets, and they each have exactly 25 seeds in them.

We will be planting one seed every two feet. If they don’t all germinate and we end up with gaps… well… we’ll just end up with gaps.

I also decided to plant them in a gradual curve rather than in straight lines. To do that, I used these.

The bundle of flags I picked up had 25 in it, so that worked out perfectly. I decided on where I wanted to have the ends and pounded a stake into the ground, with another stake to help guide the paracord, (which my husband had ordered a spool of that just happened to come in the mail today) and a tape measure to place a flag every two feet.

I attached the paracord to the two stakes in the ground, with about 3 feet of slack.

For the first flag, I eye-balled where I wanted it to be in relation to the first stake. The extra stake was used to hold the paracord taut.

I then slid the stake along the cord and used the tape measure to determine where to put the next flag. I continued to do this for each flag.

The hard part was making sure the cord wasn’t getting hung up on grass and weeds, which would mess up the arc! :-D

The end result was a long, gentle curve.

One of the things I realized as I was placing the flags was, there was no way I was going to be able to use my new soil auger. I kept hitting rocks, and even bent the wire of one of the flags!

My daughters were sweet enough to take over and dig the holes while I had to do something else. Then after supper, I got back at it. The first thing was to move the stakes in the ground over about 2 feet. For the second row, I started at the opposite end.

This will give us two overlapping rows that will stretch across the entire end of the old garden area.

Digging the wholes was certainly a challenge. Not using the soil auger was definitely the right decision.

This is an example of how many little rocks we had to deal with, at each flag, just on the surface. The holes ended up being somewhat varying in widths and depths, from having to dig out more rocks, as well as pulling out rhizomes. The riding seat we found in the basement and brought out last summer came in very handy, though the terrain was rather rough to roll around on, thanks to whomever botched the plow job however many years before we moved out here. Still better than bending and stretching!

Digging out the holes was made extra interesting by another battle.

Cartoon Mosquito Clip Art Clipart Free Clipart

Squadrons of mosquitoes were dive bombing me the whole time. Mosquitoes that seemed to treat bug repellent as nothing more than a condiment that was tasty and delicious!

(image source)

The two rows overlapped for 10 holes, at about 2 feet apart.

Tomorrow, weather willing, we will add a very damp soil mix into each hole, and get those sunflowers planted. :-)

Since the kitty pool didn’t work out, I’m thinking of taking it outside and using it to mix the bags of soil, compost and peat together. It’s big enough to fit all the bags we’ve got, and it will be much easier to mix it all together at once, than doing it in batches in a wheelbarrow. We should have enough left over to use elsewhere, too.

I’m really hoping planting the sunflowers like this works. We’re basically breaking all the “rules” doing it like this. :-D But then, pretty much everything we’re doing for gardening this year is an experiment.

As for the kitties, they are now settled with Mom in the basement. Lots of places were set up for them to cozy up into, and the girls were diligent in making sure everything set up for them was either elevated a bit, or at least not directly touching the concrete.

This would be why.

This was the corner my older brother found full of water and starting to mold, the summer before we moved here. A rain barrel outside this corner had been allowed to overflow right against the basement wall, through most of a very wet summer. He cleaned it up and bleached it (then we bleached it again a couple of months ago), and for our past two summers here, it was so dry, we never had an issue. Now, for the first time, water is starting to seep through the concrete – and we’ve had very little rain! Which means it is as we feared; the weeping tile is probably filled with soil and no longer doing their job, thanks to the overflowing rain barrel.

*sigh*

Another thing that will be a big, expensive, fix.

As for the corner, we already made sure the things we put there were raised off the floor. The only exceptions were the pieces of light figures, and the legs for a folding table. The plastic light cover is not a problem, but the metal piece is now raised off the floor, and the metal table legs were move out completely.

This would explain why, when we did a temperature and humidity check in the root cellar yesterday, the humidity was almost up to 80%! The temperature had gone up to about 13C. With a potential cheese cave in mind, the humidity would be good, but the temperature is now a bit too warm. It should be interesting to see if it gets any higher over the summer.

Meanwhile, we’ve now got a fan on the corner to help try it out. The old part basement already has had the blower for a while, to try and keep things drier there, too. We still need to rebuild the mesh cover for the window on that side, so we can open it up for the summer and not have to worry about critters getting in.

Little by little, it’ll get done. :-)

At least we were finally able to get prepping for the sunflowers checked off the to-do list!

The Re-Farmer

Gardening progress

We’re having another wild and windy day! Still, stuff needs to get planted. I made a quick trip into town and my errands included stopping at the hardware store. Their garden centre was open, so I checked it out.

I couldn’t resist.

I bought some muskmelon transplants. Muskmelon is a type of cantaloupe that I remember we grew here when I was a kid. I absolutely loved them. I only got 2 plants, and we shall see how they do.

In preparation for today, my daughter and I made a bunch of markers to label our plantings.

We made one for each variety of seeds or transplants we have, plus an extra. The cucamelon don’t need one, since they are going to be completely separate from everything else.

We… won’t need to use all of them anymore.

I’ve been hardening off our seedlings. Because of the high winds, I’ve been leaving the trays inside the mini-greenhouse with the flap completely open – that way, they’d get some wind, but still be protected from the worst of it. I also put the mini-greenhouse in front of the old basement window, where it is more sheltered from the wind, and still gets full sun. When I brought home the new melon transplants, I tucked them into an empty shelf in the mini-greenhouse.

When it was time to start planting in the garden, I came out and found this.

My initial thought was that the wind had done this, but now that I think about it, I have changed my mind. If there were a wind enough to knock those trays – and their shelves – down, the whole thing would have been blown over.

I am now thinking a cat decided to go exploring.

Unfortunately, the squash seedlings are now all mixed up. The gourds still haven’t emerged, so at least we can guess that if there is no seedling, it’s a gourd, but there were still some other squash that hadn’t germinated.

I think the few fennel seeds that germinated and promptly bolted are a lost cause. :-(

Most disappointing.

Still, I’ll transplant what I can, tomorrow. One of the seed packets I got was a “surprise” mix. Now, they’re all going to be a surprise! :-D

This is where we focused on today.

Even though this area is turning out to be pretty well sheltered from the wind, there is still enough to really dry out the soil. I watered it earlier in the day, then watered it again before planting.

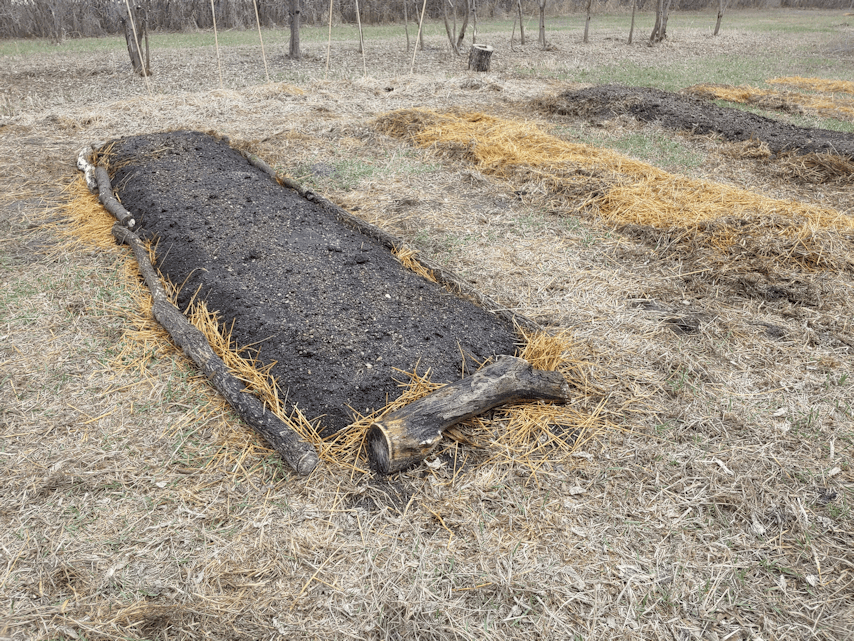
I also re-arranged the pieces of wood to make different sized beds, taking into account that I now have kohl rabi seeds and muskmelon transplants.

This is how it looks after the girls and I finished.

We still have seeds from the 3 varieties of beets, and kohl rabi left.

One of the things I’ve been doing is keeping the large plastic containers from some treats we sometimes get at Costco; cheese balls and pork rinds. I took two old cheese ball containers, drilled holes all around the sides near the bottom, then cut off the tops. I have a wood burning kit that includes a knife, and I used that to cut the tops off. Much better than hacking away at it with a utility knife or scissors! :-D These are now being used as cloches for the melons, which are surrounded by a mulch of straw. The cloches are tipped a bit sideways right now, but I will put them down for the night, when I do my evening rounds. In the morning, I will tip them over again.

Before the melons grow much bigger, I plan to add a trellis of some kind for them to climb.

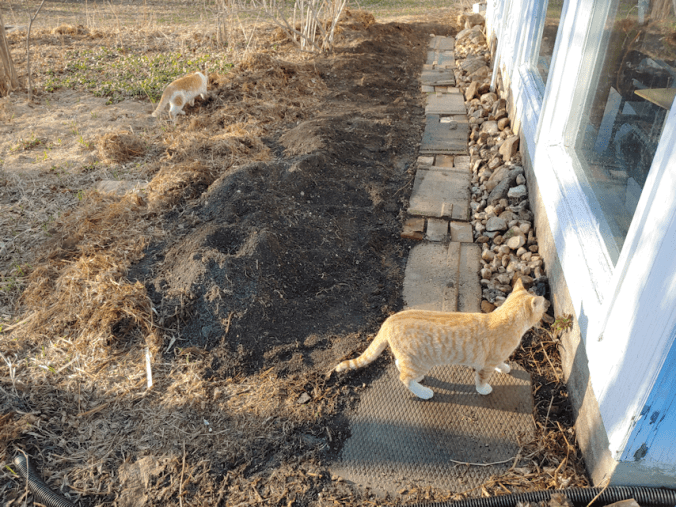
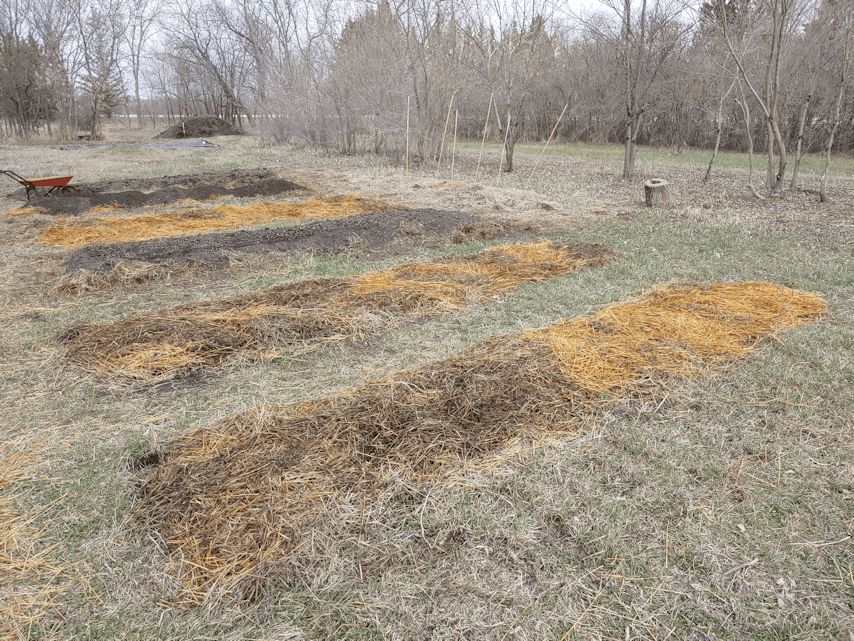
Once the seedlings emerge, we’ll remove the plastic and the boards. The seeds were planted with square foot gardening in mind, and after the boards are removed, I will most likely add straw in between the beds for foot paths. An odd problem to have here, is that the soil is so soft, we sink when we walk on it. Our usual problem is the opposite. :-D

Here’s a bit more about square foot gardening.

When we do get do building raised beds, they will be quite a bit taller than the ones made in the video, for accessibility requirements. For those, we plan to use materials to fill the beds that turn out to have a name. Hugelkultur.

Or maybe more like this…

Basically, we’ll use whatever we’ve got to fill the bases, then topping with a soil mix. It might be a few years before we reach this point, though.

There is still one section of the new garden plot with nothing planted, and that may just stay empty. Tonight, I’ll be prepping the area in the old garden, where we will be planting our squashes, so we can start transplanting tomorrow. Then we’ll focus on the sunflowers next. Depending on how things go, we might plant some of our leftover seeds from the beets and kohl rabi, elsewhere. There is still the old kitchen garden area available, so we’ll see how things turn out.

The Re-Farmer

Replacement door progress: almost there!

Today, I finally got a chance to continue working on the replacement door for the sun room.

Cutting out recesses for the hinges.

To line them up with the recesses that are already in the door frame, I dragged the broken door over and lined it up with the replacement door.

After making sure they were facing the right way, I used one of the hinges we took off to line up the recessed area, then traced around it.

And only now, as I look at this photo, I realize that for all the care I took to line it up and facing the right way, I got it backwards.

Dangit!

Ah, well. We’ll work it out.

*sigh*

I ended up carving out the recess with a combination of chiselling it, and shaving it with a utility knife.

My daughter then turned the door to access the outside of it, painted the carved out areas, and gave the outside of the door a final coat. It’s got some rough areas in the wood, so she really wanted to make sure it was well coated to protect it from the weather.

Now that I realize I goofed on the recesses, I’ll just carve out the remaining bit, so the recess runs across the door, then we’ll paint that over, too.

Ugh. I can’t believe I made such an obvious error. I even remember telling myself, when thinking about it a couple of days ago, to make sure I didn’t do that!

What a goof I am! :-D

The Re-Farmer