It looks like we’re being hit by the edge of a storm passing to the south of us, so we wanted to make sure we could close the inner door overnight.
All I wanted to do was trim the pegs and get them flush to the surface, first.
You’d think that would be easy, right? Ha! Of course not!
I first tried using a small cutting wheel on the Dremel.
I went through two of them before I gave up. The space was just too tight, and the cutting wheels shattered!
I did have a small saw that I brought, just in case. I just couldn’t cut flush to the surface (may apologies for the crappy photos; the light sucked, too!
Unfortunately, that left me with quite a bit of wood to get rid of. For this, I switched to small sanding disks.
I don’t know how I would have done this without my Dremel tool. We probably would have had to take the door off completely, which would haven us a whole new set of problems!
It’s really hard to see, but the wood plugs are now flush with the surface.
This was enough to let us close the door, and that was the main thing!
Tomorrow, I’m taking the van in to the garage earlier in the morning, so we’ll finish the rest after I get home. We’re expecting snow all day tomorrow, and through to Friday morning, but the temperatures aren’t expected to take another deep dive until the weekend. That gives us time to get it done, without getting things too cold in the entry.
I’m glad we have a storm door, of this would be waiting until spring!
Well, for better or for worse, I’ve started working on the door hinges.
This is intended to be a temporary fix, until we can replace the door and frame completely, but I have no idea when we’ll be able to do that, so this patch job may need to last a while.
The first thing to do was to open the door as wide as possible (with a built in closet in the way, that isn’t as far as I’d like!) and place supports under it to hold the weight.
One of the things we’ve been finding lots of, while cleaning this place up, is laminate floor tiles. It’s amazing, how handy these have become. A couple of pieces of wood under the door made up most of the height, then it took 3 of these tiles to get it fully supported where it needed to be. We’ve also used them to put under bench legs and wooden shelves in the basement, to get them off the damp concrete, and so on. I’ve found a couple of cases of these tiles, just in the basement – there are more in the barn. Definitely things to keep, even though they’ll never be used as flooring! :-D
Once propped up, I could remove the screws which, I’m happy to say, were not damaged as I had thought they were. I do not have to replace the screws. I was able to remove 2 of them with just my fingers, and the only reason I had to use a screwdriver for the 3rd one was because it was the offset middle one, where the hinge wasn’t pulling away from the door as much.
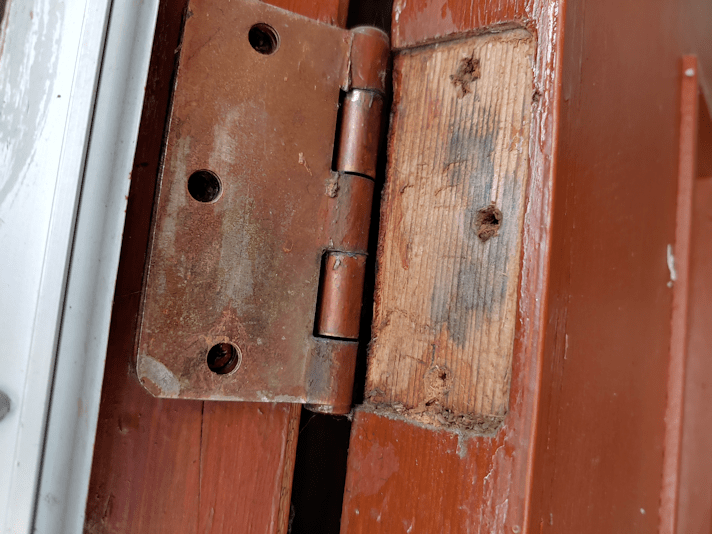
The hinge still needed to be pried loose before I could take a good look at the damage. It fits perfectly in that recess.
Because of how close this is to the frame and storm door , I actually got a better look by taking a picture, then with my own eyes!
The damage isn’t actually as bad as I feared it would be.
The next step was to bring out the Dremel to clean out and enlarge the screw holes.
The Dremel just barely fit in the space available, but it worked. I used a couple of grinding and engraving tips; first a small cone shaped one to clear out the holes, then a metal tip to clean out further into the openings than the cone could go.
The wood is so dry, there was smoke coming out of the holes from the friction!
For the wood plugs, I ended up choosing some pieces of lilac branches I’ve still got hanging around. They were already the size and shape I needed; I only had to strip bark off the pieces, then make one end slightly narrower. Also, I will need to pre-drill holes before putting the screws back in, to prevent cracking, and the core of the lilac is already little more than sawdust that can easily be removed. They’re basically already pre-drilled. :-D
I was going to use wood glue to put the pegs in, only to discover it had dried out, so I went with all-purpose glue that I happened to have.
After making sure the pegs fit into the holes, I applied a bit of glue to their ends, then gently tapped them into place with a little bitty hammer I happened to have. With a normal sized hammer, I wouldn’t have had the space to swing, without hitting the window of the storm door.
The pegs will now sit for a few hours before I check the glue and decide to cut the pegs flush tonight, or wait until tomorrow morning. If I can cut the pegs, we’ll be able to close the door most of the way as the glue finishes setting overnight. If not, we’ll be stuck with this all night…
These are the pieces of insulation we’d cut last year, to fit over the inner door, held in place with Velcro strips, to keep frost from forming on the bottom of the door, and ice on the windows. It worked well, but there were some issues with the strips, and we haven’t found a workable alternative, yet. Thankfully, this winter has had only a few days cold enough for the ice and frost to form.
The arm bar is coming handy for holding the pieces in place!
If this works out, we’ll do it again for the middle hinge. That should tide us over until we can replace it all with an insulated steel door and a steel frame.
Well, I’m certainly glad my daughter and I have telephone medical appointments this afternoon, and don’t have to actually go anywhere.
As I write this, we are at -34C/-29.2F, with a wind chill of -39C/-38.2F
It has actually warmed up a bit.
The heated water bowl is almost completely frosted over! Only a couple of cats came out into the cold. Their food bowls are still pretty full – even the one inside the cat house – but I added some fresh kibble, anyhow. The sun room is at -12C/10.4F, so it’s still frozen. They like the fresh kibble better; I think it’s easier on their teeth.
At these temperatures, I didn’t even try to switch out the trail cam memory cards. I doubt our vandal would be engaging in nefarious things in this weather. Plus, we still have the hard wired security camera to keep an eye on things.
Meanwhile, I’ve made the call to the number on our leaking hot water tank. I now have an authorization number and need only to go to the store it was purchased at, with the sticker from the tank, to get a replacement. He even saw on the file that this was already a warranty replacement tank, but he asked no questions.
At these temperatures, however, I am not going anywhere. Even if we lost hot water completely, we’d just go back to heating water on the stove as needed. I suspect it’s actually a good thing the tank is leaking the way it is, instead of water pooling on the bottom as it did, last time. That is probably the only reason why it’s not doing the weird things the other one started to do, since the water isn’t reaching anything sensitive; just making the insulation damp. Just a guess on my part.
Thankfully, this polar vortex that’s hitting us should last only a few days. By Wednesday, we should be back up to a more typical -21C/-5.8F. By Friday – which is when the van is going in to be checked – it is forecast to reach a balmy -10C/14F.
It’s past 1 am as I write this, but I just had to.
I went down into the old basement to treat the hot water tank with hydrogen peroxide before going to bed. This is what I found.
It’s leaking!
(That ring of minerals on the concrete is not new; it’s been there since the last time we had issues.)
We don’t go into the old basement often (and with the cats, we’ve put all the most breakable stuff into the old basement and blocked off the opening between the two basements, so there was no chance of kittens falling into the sump pump reservoir or otherwise hurting themselves). The last time anyone went down there, that I can remember, was my daughter, the last time the tank was treated. I called her over to see, and confirmed it wasn’t leaking the last time she was down there.
In trying to see where it was leaking it appeared to be coming from the bottom access panel, too. So we opened it up.
Yup. It’s been reaching that high!!
We’ve left the panel off. Tomorrow, I will call the number on the tank to talk about getting a replacement under warranty.
Again.
For those who are new to the blog, when we first moved here, this place still had the tank that was installed when my dad got the well dug near the house and installed running water. He got the tank second hand. When cleaning up the basements, I found the old warranty certificate and bill of sale for it, dated 1963, if I remember correctly.
It died shortly after we moved in.
Long story short, we went without hot water until we could afford to get a plumber to replace the tank for us.
That worked out well for a while, until the water started to get hotter and hotter, all on its own. We called the plumber and he changed the thermostat, but that’s when we discovered that it had started leaking at the bottom. When he opened the bottom panel, he found the insulation saturated with water.
Not long after that, we lost hot water completely.
We then had issues with discovering the local hardware store it was purchased at, not doing warranty replacements. I tried working with the company directly before finally finding a branch someplace else that had would honor the warranty. We then had to get the plumber back to install it for us, and it’s been working fine ever since. The only issue is one we’ve had since replacing the original tank; the hot water would start to get a sulfur smell. Every month or so, we would drain the tank a bit, then use the vacuum created to suction hydrogen peroxide through a hot water tap in what used to be the laundry sink. It needs to sit for at least 4 hours, so we would do it before bed, so the water could be used in the morning.
It’s been about 1 1/2 years since that tank was replaced under warranty. And not it’s happening again.
What the heck is going on? How does a second hand tank last for nearly 40 years, but new tanks aren’t even making it 2 years?
But at least we still have hot water. I guess it’s a good thing it started visibly leaking this time, before we started having problems. We don’t have the water getting super hot, like the tank started having issues last time. It’s “just” leaking.
I found them while looking for something else, of course. :-D
Here is where, on the tank, I want them to sit.
The bar across the middle has extra surface area in the corners of the ledge the covers rest on. There’s lots of room, here.
The outer corners, however, don’t have that, so there’s a lot less margin for error in positioning the pads well.
The first step was to clean off the ledge the frame rests on. An old toothbrush worked very well for that!
Since the cross pieces of the frames have an angled edge, to better fit into the space, I figured it would be easier to place the felt pads in position on the ledge first, adhesive side up, then placing the frame on top.
The felted pads I have were from a larger package with mixed sizes of circles, plus long, narrow ovals. The larger circles were used up, and all I had left were smaller ones, and some of the long ovals. I’d hoped I still had some larger circles left. If I had, I would have cut them in quarters, and fit them right in the corners, but half circles would have to do!
Once they were in position, I lined up the cover and dropped it down, pressing just enough to make sure the adhesive stuck, then removed it to press the adhesive in more thoroughly.
In this corner, you can see the pad will protect the tank’s frame from the wire. This was the edge of the roll, so no sharp bits sticking out, like the edges I had to cut, so I didn’t trim it.
And this is why I lined the pads up to the corners of the tank, rather than the frame. Yes, there’s a likelihood that the pad will get pulled off where it’s overhanging, if I leave it like that (I will trim it later), but it also isn’t sitting on the screw head. It was supposed to be countersunk, but some of the screws simply stopped and would not screw in any further. I am not sure what was stopping them but, whatever it was, I was wrecking my screwdriver’s tip, trying to get them to go in further, so I stopped. The others were just fine.
So the corners are padded now, protecting the tank’s frame from being scratched up, should a cat decide to jump onto the cover.
When I was fussing with everything to prepare for this, I did have a kitten not only jump onto one of the covers while I was there, but also walk across on the light fixture! Not a problem for a light kitten, but a potential problem, if one of the heavy adults tries to do it. Thankfully, they seem to not like the new covers and are staying off. At least while we’re around to see! The few times I’ve seen one of the adult cats up there, they have stuck to walking on the wood and stayed off the wire and away from the light fixture.
Meanwhile, the baskets and other items stored in the tank have been removed. I’ll need to take a vacuum to the bottom to clean it, then see how my seed trays fit on the bottom. That will help me decide whether the rigid insulation will be lining the inside, or the outside, of the tank. Whatever I do with the sides, the bottom will have its own layer of insulation lining it, too.
It’s remarkable how handy that insulation has been. I’m glad my daughter bought so much extra!
I’m going to need the little step ladder to be able to access the bottom of the tank. I could barely reach to get the smaller baskets out!
The joys of being short! LOL
Another little bit of progress made! :-) I can hardly wait to see how this works for starting seeds!
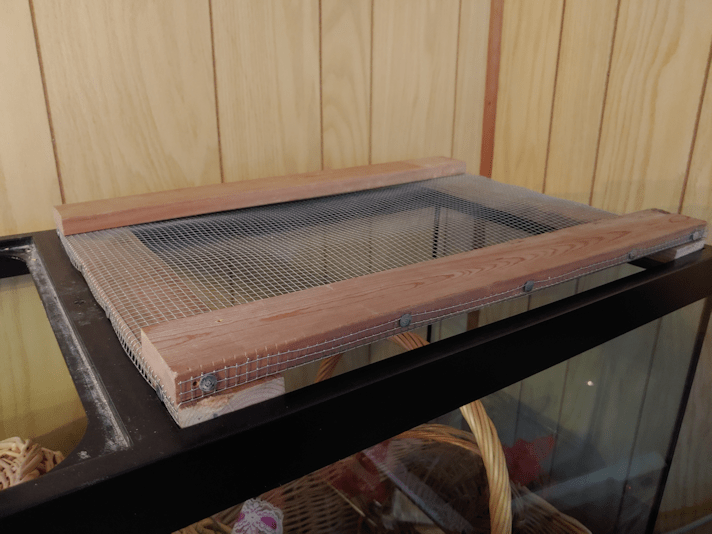
Yesterday, I got started on making covers for our big fish tank, to keep the cats out. Today, I assembled the first one.
Of course, things did not go to plan.
Does anything ever? :-D
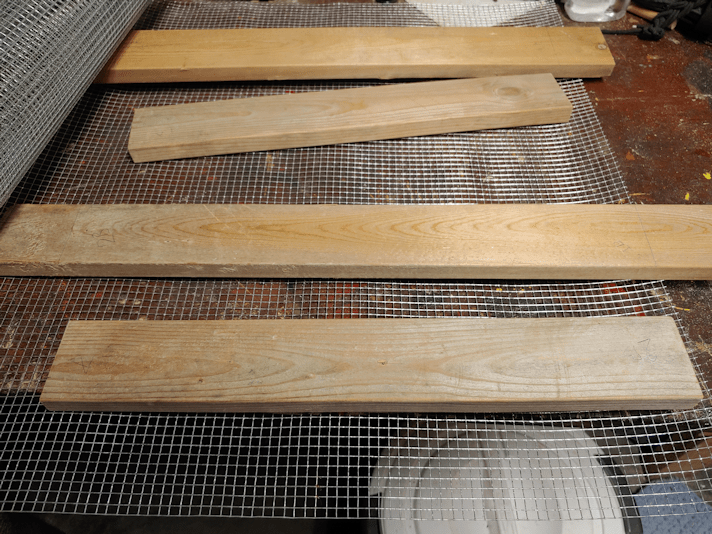
One of the things I needed to figure out was how to secure the hardware cloth to the frame pieces, for those inevitable times when a cat jumps on them. All I’ve got for materials is whatever we can find lying around the farm. While doing my rounds this morning, I went digging in the side of the garage where we store the lawnmowers and snow blowers. I knew there were some roofing nails in there, so I grabbed a while bunch and brought them inside.
Here is the first problem.
All of the nails were huge. There was only a single smaller size, and it was still too large. What I wanted to do was secure the mesh to the tops/bottoms of the boards making up the frame. Previously, we’ve used a staple gun to do that, but these were not for things where the wire mesh was expected to hold weight. Particularly not the sudden weight of a cat leaping onto it from above.
The mesh was going to have to be secured along the sides.
That meant cutting it with a half inch overlap on all sides.
I’m getting closer to the end of my roll of 1/8 inch mesh, and it really does not want to unroll at this stage! :-D I had all the boards on there to hold it down, and it still kept rolling itself back up again!
Once the mesh was cut to side and flattened, I affixed it to one side.
Normally, I would have used the staple gun to tack it in place, but I couldn’t find it anywhere. Which is really weird, because I’m the only person who uses it!
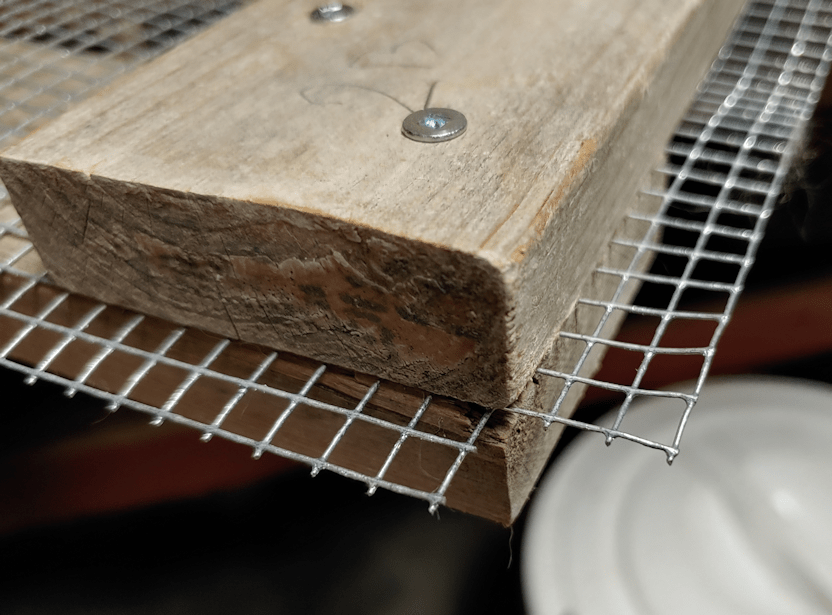
So it had to be tacked in place by screwing in the cross piece, holding the wire as taught as I could in the process.
Then I took out one of the screws in each corner.
I had placed the wood in place on the tank and marked each one with pencil, but once the hardware cloth was in place, I couldn’t really see my marks anymore. Plus, with the cross pieces a fraction too long, I had to make sure I didn’t line the side pieces up to the other end, or the while thing would be to big.
So I quickly drilled a pilot hole in each of the other corners of the cross pieces, then went back to the tank.
This way, I could place the long pieces where they were meant to sit, line everything up, then add a couple of screws through the pilot holes to hold them in place.
Then it was back to the basement to continue.
Once each corner was secured with a pair of screws, it was time to bend the wire mesh. Since the sides would be bent in one direction, and the ends in the other direction, I first cut out the corners.
The wood pieces may have been lined up to the tank, but no matter how careful I tried to be, the wire mesh ended up uneven.
Ah, well.
Once the mesh was bent, I drilled pilot holes for each nail (to prevent the wood from splitting) and hammered them in. The flat tops of the roofing nails were perfect for securing the mesh. Very different from how I had to do it with the larger mesh on the screen “door” we made to keep the cats out of the old basement.
Time to test it out again!
Oh, dear.
The addition of mesh and nails – especially the nails – made it wider. It wasn’t so much that it no longer fit. I could have let it just rest on the nail heads, I suppose. They would, however, damage the tank’s frame.
There was a very easy solution to this problem.
Flip it upside down.
With the cross pieces being every so slight too long, I used my Dremel to take off the corners at roughly a 45 degree angle.
It now fits!
Unfortunately, the wood is a bit warped, so it doesn’t sit flat, but it should still do the job.
There are still a couple of things I need to do. One is to find some way to cover the edges of the hardware cloth, for safety reasons. I’ll probably just use Gorilla Tape, if we still have some.
The other is to find my self-adhesive felt pads. The kind that’s meant to go on the bottoms of chair legs or the like, to protect floors. Since the bottom is now the top, the screw heads are facing down, and each corner screw is sitting on the plastic ledge in the corners of the tank. It wouldn’t be an issue, if I weren’t expecting cats to jump on it, so a bit of padding would be a good thing. I haven’t seen them since we packed for the move, though. :-/
Aside from those 2 things, this cover is done.
The other one will wait for another day! :-D The earliest we should be starting any seeds is in late March, so we have time! :-)
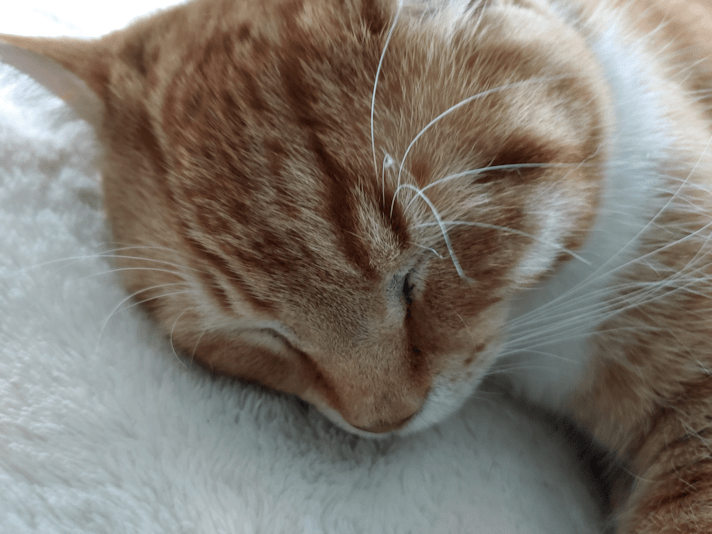
Today was a nice and quiet day, so maybe it was as close to the life of our cats as we humans can manage! :-D
Just look at Keith!
He is such a calm and quiet cat. We brought him indoors to better treat his eyes; they were never as bad as his brother David’s, but they were not really getting better. Even as a kitten, we could tell he would have a sweet and calm disposition as an adult. We probably would have brought him in much earlier, if his cousin Cheddar hadn’t impaled himself with a stick through his armpit and needed to recover indoors from surgery.
I still have that cheese stick, in it’s vacuum sealed container. LOL
One thing out of the ordinary happened today. I had a conference call with my siblings and mother – a technical feat my brother pulled off involving cell phones, land lines and speaker phones – to get us all on at the same time, and able to hear each other!
The topic of conversation was our vandal.
A few days ago, while I happened to still be near the end of our driveway while doing my rounds, I saw a vehicle turn onto the road. As I usually do, I waved at the driver as he went by. Only then did I realize it was our vandal, driving one of his other vehicles, so I didn’t recognize it at first.
He very studiously looked away from me as he drove by.
I thought nothing of it, but I should have made a point of calling my mother to let her know. Sometimes, when he sees me, he ends up calling her and going off on a rant. He hadn’t done it the last few times I saw him, though, so I didn’t think of it.
The next day, I got a call from my mother, asking me if anything had happened – if I got anything else in the mail regarding our vandal’s ridiculous suit against me, or something. I told her no, I only saw him drive by the previous morning, then immediately asked what happened.
He had called just her. She made the mistake of answering without checking call display first. He, as usual, launched into a tirade. He kept asking her things like, why is she trying to put him in jail (he’s been saying that since I laid charges against him, after catching him damaging our gate), but never giving her a chance to speak. She finally hung up on him. He called back immediately, and she answered again, quickly said that he was putting himself in jail, then hung up again.
The whole thing left her quite rattled and it took her quite a while to calm down.
So today, my siblings talked about what happened, and a few other things that have gone on over the years. I found out that, among the things ranted about at my mother, our vandal told her that I said – to him – that my mother shouldn’t attend her sister’s funeral.
My aunt is living but, as you can imagine, that freaked my mother out a bit, since she is in a nursing home.
Of course, I haven’t spoken to our vandal since I laid charges against him, two years ago, so this claim of his was just another thing he invented, like so many other things.
I learned today that when he had called my brother at work a few months ago, he ranted so loudly, everyone in the office could hear him!
The question is, what do we do about it?
Unfortunately, not much. I’m already doing the only things I can. Anything he does to my mother, she has to do herself. We can help her, but we can’t do it for her. The only way someone else could do it for her is if she were medically declared not of sound mind, and she is still far from that.
The frustrating thing is that, with our province extending the lock down again, my restraining order application’s court date will likely be delayed, yet again. I need to phone the court office closer to the date they gave me when I last called about it, so I will be calling next week. His civil suit against me is by teleconference, so there’s no delay in that. As you can imagine, it is extremely frustrating that a criminal matter is being delayed in the courts because of government shut downs, but civil cases can go ahead by phone. For us, so far, he’s only tried to destroy property and screamed verbal abuse as us, but what about people who applied for protection orders that fear for their personal safety? These lock downs have already caused a spike in domestic abuse, as so many tried to warn about. It’s hard enough for people to get the protections they need to begin with. Now, with the courts closed, they can’t get any at all.
The other frustrating thing is that our vandal is angry at me, for being here on the farm and actually standing up to his abusive behaviour, but it’s my mother that he takes it out on. He seems to still think he can get her to give the property to him, even though she no longer owns it, while at the same time, still seems to think she has given it to me. So… he thinks she can “take back” ownership from me, when I don’t own it, and give it to him?
That this makes sense to him is just a reflection of his state of mind. What is more confusing is how he managed to convince other people that this makes sense, and willing to even leave anonymous notes on my mother’s door – in spite of her building being locked down to visitors – telling her to give the farm “back” to him.
Bizarre.
On the plus side, my siblings, mother and I are being a lot more communicative and drawing around my mother to protect her as best we can. That we have to do it at all is just sad.
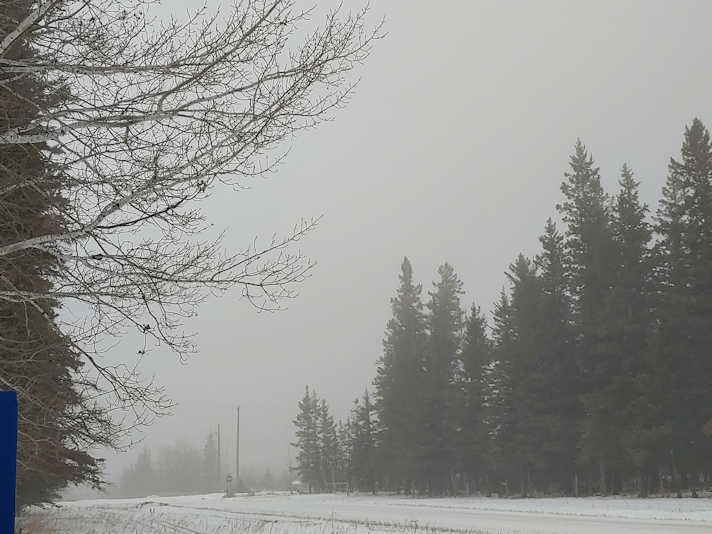
It’s past 10am as I start this post, and we are still surrounded by fog!
The camera automatically cleans up images, so this photo does not reflect just how dense the fog was when I took it!
Not only does fog normally disappear quite a bit earlier than this, but it’s also pretty breezy out there. I’m used to winds and fog on the coasts. On the prairies, a stiff breeze usually blows the fog away in no time. Not today!
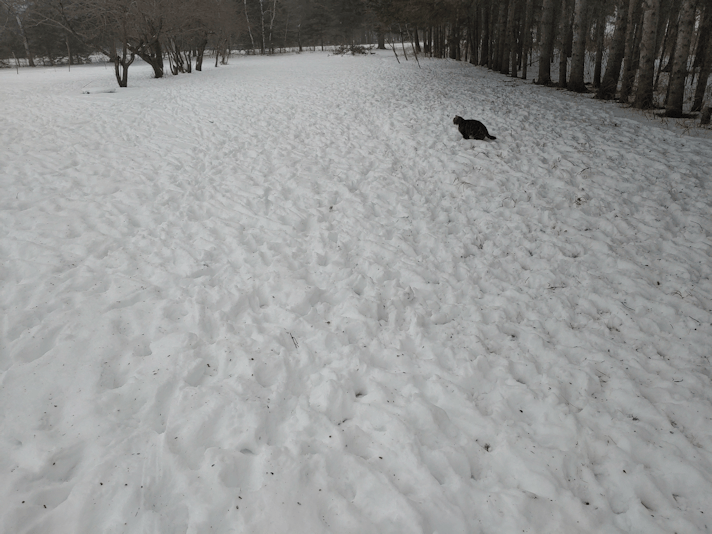
I just had to share this high traffic zone picture!
There are deer paths cutting through the old garden area, but most of the tracks are all long here. When we first moved here, you couldn’t walk under the spruces, because of all the overhanging branches. The deer seem to be very happy that it’s all cleaned up!
Down the middle of this area, between the spruces and the crab apple trees, we are planning to plant Korean Pine Nuts. They need to be kept shaded for their first 5 years (the transplants are typically sold at 3 years), and this location is prefect for that. We will still put covers to shade them more, but also to keep the deer from trampling them. After 5 years of being really tiny, they are supposed to have a sudden growth spurt. It would be another 5 years or so before they have edible pine nuts. We are hoping to buy them and get them started next year.
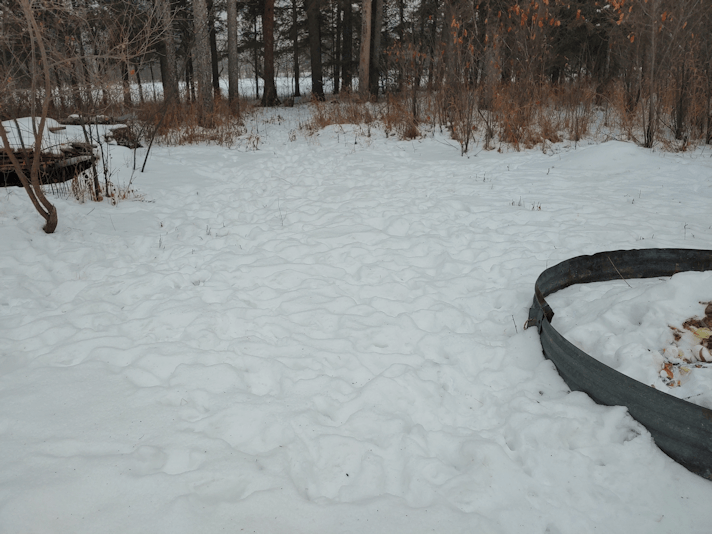
This is another high traffic zone for the deer. The open space in front, past the ring for the compost pile, is also where we plan to build the outdoor bathroom.
Not getting that started last year, as I’d hoped, may turn out to be a blessing. While taking this photo, I took a good look at the spruces in the background. There was one I had already identified as needing to be cut down, but looking more closely, there seems to be at least 6 or 7 dead spruces that we’ll need to cut down. Possibly 8 or 9, if I count the ones closer to the house (we’ll be hiring someone to take those ones down). I wouldn’t want any of them falling on our shed after we build it! Plus, if we cut them down before they fall down, the wood might still be usable for projects. Usually, by the time they fall, it’s because ants have made nests in the trunk and they are left basically hollow.
Once the dead trees and some of the underbrush (mostly spirea!) is cleared away, that is where we will be planting the mulberry tree we will be getting this spring. It will get full sun, while still being sheltered by the other trees. This is one tree we’ll have to make a point of wrapping up in the fall, for at least the first few years. A mulberry tree can start producing fruit by the second year, so that will be exciting! In the future, we plan to get a variety native to the more Eastern parts of Canada. It is becoming rare, so we will have to make sure to plant it away from any others we get, so they don’t cross pollinate. That might be 2 or 3 years from now, though.
One of the things I love about doing the morning rounds is looking at the progress made. Even though we are “behind” on getting this area in particular cleared out, it’s reached a point where it no longer seems as overwhelming, and I can get excited about the things we can do in the increasingly near future!
We are having some beautifully mild weather right now – the forecasts are still predicting we will hit a couple of degrees above freezing! (and I’m already seeing people “blame” it on climate change, as if we’ve never had warm Januaries before… *sigh*).
Our hard wired security camera is set to take a photo and email it to me when the motion sensor is triggered. With the infrared flash, that often means I wake up to a lot of pictures of precipitation. We had neither rain nor snow last night. Instead, this morning, I found a whole lot of very cloudy, out of focus pictures.
Yup. We had fog heavy enough to trigger the motion sensor last night!
I discovered something about the new trail cam. When the lens gets frosted over, we get this.
That is one heck of a pink! :-D
Even after the frost is brushed off the lens, there is a pink hue over everything.
The other cameras would go greyscale, or blue.
I find this unexpectedly cheering… and I don’t even like pink. :-D
Today we come to the close of what has got to be the most bizarre year we’ve had in my 5 decades! I think many of us will be very glad to see the hind end of 2020, even though there’s no sign that 2021 is going to be much different. :-/
[edited for formatting problems. WTH, WordPress??]
Thankfully, one of the side benefits of 1) living in the boonies and 2) living on my husband’s disability income, is that not a whole lot of the crazy affected our everyday life. We were already living on a tight budget, and disability payments are not affected. We were already doing things like stocking up in bulk purchases once a month, so that changed only because suddenly, everyone else was stocking up, too! My “job” is taking care of this place, and only one of my daughters had to stop working outside the home because of the crazy. The other was already working from home, so as long as we’ve got internet, she’s good to go. We got to focus on taking care of the property and each other, moving forward as much as possible on our long term goals, and basically be hermits. Which is kinda how we like it! The only real negative thing affecting us is my husband not getting the medical care he needs, but honestly, I don’t know how much of that can be blamed on the virus response. We’ve been here for 3 years now, and he still hasn’t been able to get the same level of care he had access to when we lived in the city. :-(
For me, one of the things I’ve tried to do is keep up with daily posts here on the blog, even if it’s just posting a photo. I’ve learned long ago that if I don’t get at least some writing in every day, it’s not very good for my mental health, but I also hope that the things talked about here will be enjoyed by, and useful to, others.
Though I am making no efforts at all to promote the blog, somehow, people are still finding it and following along. I don’t know how you all are finding us, but I really appreciate you stopping by and giving it a read, liking and commenting. Thank you so much!
In celebration of the end of the year, here are the top 10 most popular blog posts written in 2020. I skipped over any that were written in previous years, just because I want to focus on 2020. All links should open in new tabs, so you won’t lose your place here. :-)
So here they are, starting with number 10.
Comparisons. As this was our first year gardening, it comes as no surprise that we are starting with a gardening post! This one is from early August.
This year, I did something new, with a series of “Recommended” posts. These ended up getting their own permanent page, with a tab at the top menu. Number 9 is one of these posts. Recommended: Justin Rhodes. There is a massive number of videos on their YouTube channel! If you have any interest in self-sufficient living, do check them out!
This year, I finally started to do some more creative things with all the trees we’ve been cutting down, other than sticking them in huge piles for future chipping, or burning them.
The Wonkiest comes in at Number 8, showing off my first ever carving of a fork… and it truly is the wonkiest!! :-D
Every now and then, a post becomes popular, and I have no idea why! Like this one, at number 6: Let’s give this a try. It’s just a mix of all sorts of things, but apparently, people found it interesting!
Another Recommended post on the list. Number 4 is Recommended: Kris Harbour Natural Building. This YouTube channel is filled with years of videos, following along as Kris Harbour builds off grid in Wales. Well worth checking out!
And now we reach our number 1, most popular post of 2020.
This one blew away all the other posts, with almost triple (!!) the hits that number 2 got! In fact, it still gets hits almost every day. It’s another from the Recommended series of posts. Recommended: XiaoXi’s Culinary Idyll It’s another YouTube channel, and there are some really awesome videos to check out. Yet, I have no idea what makes this post stand out more than any other, that it should get so many more hits!
If you have discovered this blog through this post, I’d love to hear what brought you here! Please feel free to let me know in the comments. :-)
Well, there you have it! The top 10 must popular blog posts written in 2020.
I look forward to joining you again in the New Year! May 2021 be a year filled with many blessings, growth, healing and above all, normalcy!
God knows, we could all use some plain, boring old “normal” right now!