Today, I finally started working on the Christmas decorations I was planning to make with the dehydrated orange slices I’d prepared earlier.
Of course, things didn’t work out to plan! :-D
Do they ever? ;-)
I was going to use cinnamon sticks, plus some little decorations I’d saved from Christmas crackers over the years – they would have been the perfect size – to decorate the orange slices.
I couldn’t find them.
Many of these were collected before we moved, and now I’m second guessing myself. Did I bring them along with my other craft stuff, or did I give them away before the move? I had to pare things down quite a lot for the move.
And yet… I’m sure I saw them since the move, as I’ve had to reorganize my crafting materials a couple of times, since unpacking them.
No worries, though, I decided to use some pine cones I’d gathered from our spruces a while back.
I didn’t have enough to put two on each slice, though. We kept finding them with our feet, around the house, before I discovered one of our cats digging in the container they were in, stealing a pine cone, and running off!
I had enough left for this project, though. I just made sure the biggest cones went on the smaller slices, and paired up the smallest cones on the bigger slices.
Now, I just need to see if the adhesive will work. If not, I’ll break out the hot glue gun, but it’s not like anything is going to stick to dried orange slices very well! :-D
I haven’t decided if I will do more to these or now. I might use a spray adhesive on them, and dust them with ground cloves. It’s more about making them smell unappetizing to cats than anything else! :-D
I got a couple of bigger jobs done in preparation for winter. The smaller one was taking care of a window on one of the sheds. This is the one my brother and I had patched the roof of earlier in the year, and is one of the few sturdier sheds left.
My original intention had been to simply board it up, but the window is pretty much the only source of light in the shed, and I had a vague memory of seeing a window in the barn that was about the same side. So I took some measurements, then went looking around.
I found the window, and it turned out to be almost exactly the same dimensions!
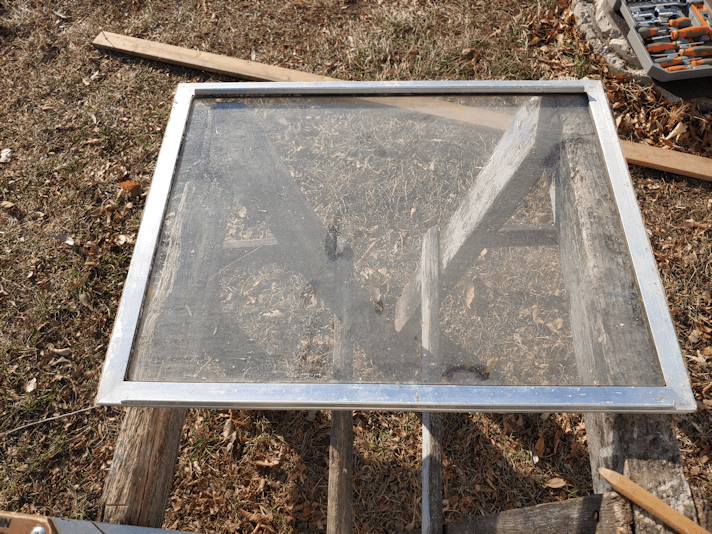
And when I say “almost the exact dimension”, I mean the hole in the wall. The frame makes it just barely bit enough that it doesn’t just fall through!
It also looks like it came off of a storm door.
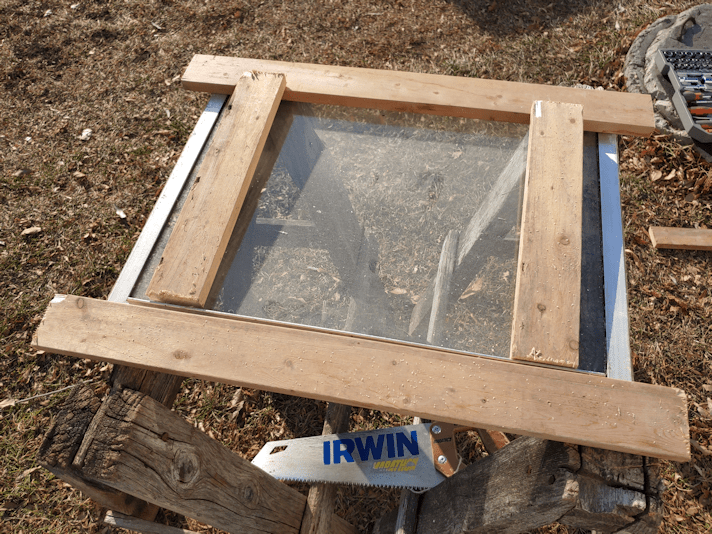
I grabbed a piece of salvaged wood and cut a new “frame” for the window.
If you look at the first photo, you can see the parts of the window that would have been used to slide it up. One of them is flush with the outer edge, the other is flush with the glass. The one flush with the outer edge will be resting on a piece of wood at the top.
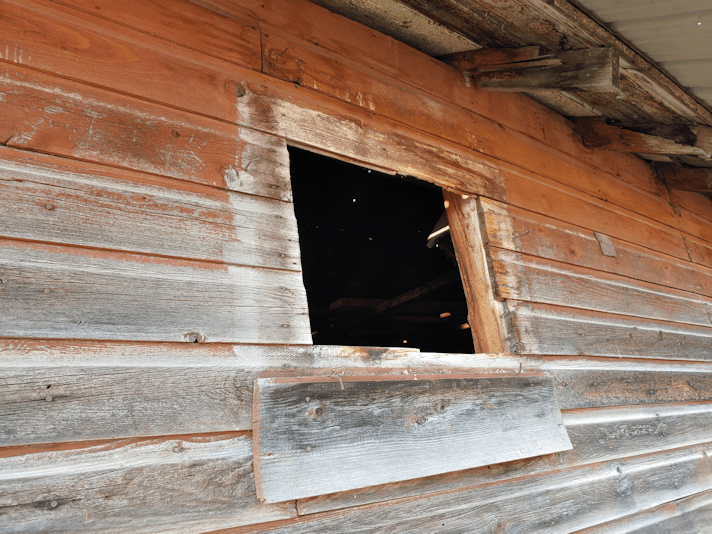
This is the window opening. It is, literally, a hole cut in the wall, between two joists.
I also picked up as many pieces of the old window as I could, and some of the bigger pieces of glass. I couldn’t get all of it, though. They are too buried in the grass. This concerns me, as the renter’s cows could hurt themselves. I’ll have to do something about that.
Since I didn’t feel like fighting with an extension cord to the barn, I pre-drilled holes in the wood and put the screws partway through, before I brought everything over. I even cleaned the dirt off the glass, too! :-D
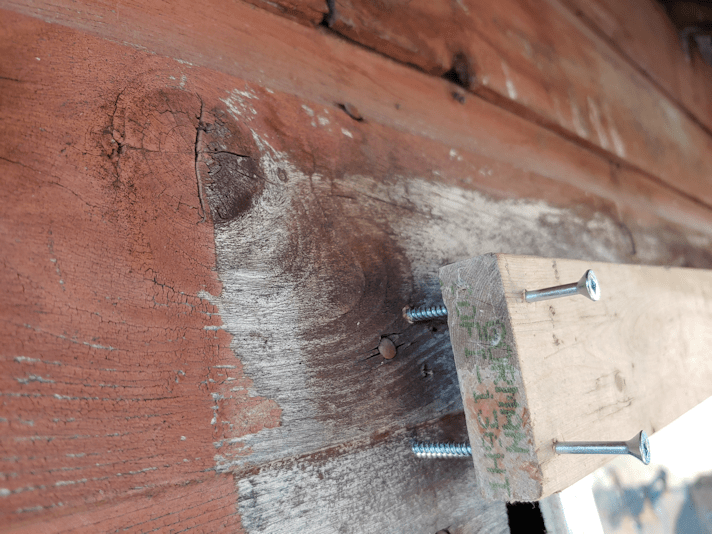
I forgot about the cladding creating gaps, though. I ended up having to replace the screws in the top and bottom pieces with longer ones. I didn’t bother changing the screws in the side pieces, since they don’t need to support anything; just cover any potential gaps from the uneven cut of the opening.
I ended up moving the side pieces in a bit, butting them up against the metal strip on top of the bottom piece. It made them a bit more secure.
There’s one screw at the top right hand corner I couldn’t screw in all the way. I think I hit something in the joist; probably a nail.
Speaking of nails, if you look around the window, you can see several bent nails. There’s two at the top, one on each side, and two at the bottom. I’m pretty sure they’re all that held the old window in place! Well, that and the board hammered onto the wall underneath. No wonder it fell off!
I’m rather happy with how this turned out – and very happy not to have to board it up.
Now I just have to board up some windows in the pump shack. I don’t think I’m going to luck out and find old windows to fit, like I did with this one! That, however, will wait for another day. For today, I had a much bigger job to move on to, and that one will get it’s own post! :-)
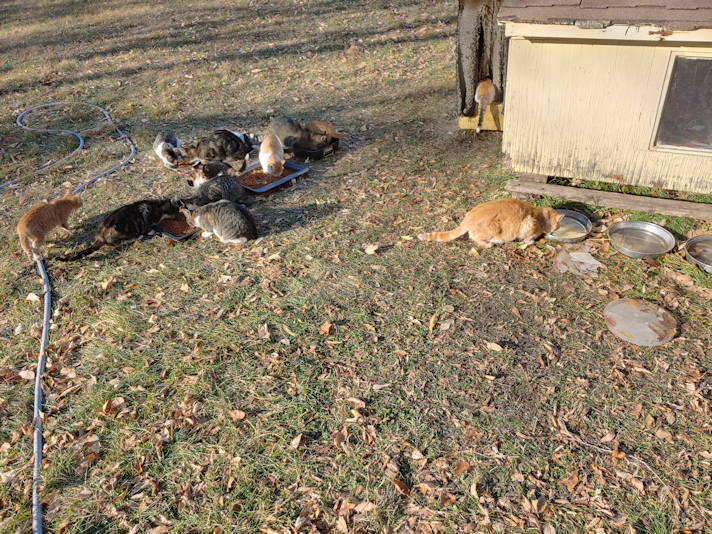
There are 12 cats in this picture. Happily, Rolando Moon is still hanging around, busily hissing at any cat that comes near. We haven’t seen Creamsicle in a while, though. I hope he is all right.
The cat butt sticking out of the entry is a hoot. That is Rosencrantz’s baby, and she seems to be the shiest of the bunch.
As you can see by the frozen blocks of ice, artistically embedded with leaves, it’s been getting a bit cold out at night! It did warm up a few degrees above freezing. Not good for paint, but it had to be done.
I can now officially say that replacing the door on the sun room is DONE!! I just came in from outside a little while ago, and the paint was dry enough I could close the door. What’s supposed to be blue is now blue, what’s supposed to be white is now white, and nary the twain shall have contact with each other!
Yaaah!!
No, I didn’t take pictures. I’m am tired of taking pictures of that door! :-D
The next project is the shelter for the cat food. It will be placed about where the kibble containers currently are. I want to position it so that it will also provide extra shelter for the entrance to the cat house. The heated water bowl can be plugged in, inside, but the bowl has to be outside, since there’s no way I’m going to be lifting that roof every morning to refill their water. ;-) The shelter for the food containers will help keep the snow off the water bowl, too.
It took a couple of hours, but I got the end pieces of the frame done.
Working with this wood we salvaged from the barn has been a challenge. Nothing is even, so about the only thing I can measure is length. After that, I basically just made sure all the pieces matched and lined up. Not being able to just take measurements meant I had to get creative in lining up the pilot holes. Just making the pilot holes was an issue! My drill bits that were the right diameter for the pilot holes are just barely long enough to drill through the wood. I went hunting in the basement and the garage and, while I did find longer drill bits, they were all too large.
Thankfully, the bits I did have were long enough that, after drilling the pilot holes in one piece, I could position them on the other piece, “drill” though the pilot holes again, and make a mark on the other piece.
It worked most of the time. With the uneven wood, there were a couple of spots where the bit just wasn’t long enough to leave a mark.
Once I’d marked the pieces, I could drill more pilot holes, then screw them together.
When we used this wood to make the goat catcher, I had 3 inch screws, and only used two per corner. This was meant to be temporary, but I still didn’t expect it to be so wonky, it would end up bending and breaking the screws! So this time, I got 3 1/3 inch screws, and there’s 4 in each corner.
That thing is solid!
I started by attaching the 2 ft cross piece on the bottoms. The first corner was screwed together manually. Even with the pilot holes, it was not easy – and with arthritis in my wrists and fingers, rather painful. Our new drill isn’t a quick release type, and I didn’t want to be switching from drill bit to screwdriver tip, over and over, so I decided to use an old drill that we “inherited” to put in the screws.
That worked much faster!
Once the cross pieces were in, I got out a tape measure and figured out how much of an overhang I wanted on the roof supports. I decided to make the roof supports 3 1/2 feet long.
Lining those up at an angle was a pain in the butt! Once again, it was more about making sure the pieces matched, because there was no way I was going to be able to take usable measurements. I managed to get them lined up and the pilot holes done. By the time I was putting in the last set of screws, though, the drill was starting to complain, so I set them as far as I could before the drill started having a hard time, planning to screw them the rest of the way by hand.
When I took the screw driver tip off the drill, I realized I was seeing smoke coming out of the drill!! I remember that happening when we used it before. This old thing overheats very quickly!
By then, it was getting too cold to keep working outside, so I will continue the rest tomorrow. Once I have the 6 foot horizontal supports in place, we can take some measurements for the floor and wall boards.
The good thing is, we’ll be using the scrap wood in the junk pile. They are a lot thinner. That means I can finally use the table saw, and do all the cutting at once. :-) Those will be nailed into place; in cleaning up the basement, we found an old ice cream bucket full of nails that are just the right size for this job.
We can also go hunting in the barn or sheds for something to use as a roof. The roof supports are 3 1/2 feet long, but I hope to be able to have a sheet that’s 4 ft. The roof will be the last thing put in place.
After that, it’ll be done for this year. It’ll need to be painted, but we’ll be using it right away, so that will wait until spring. The one exception might be the roof, depending on what we find to use for that.
I hope to get a lot more done tomorrow, but that will really depend on the weather! At least they’re no longer predicting snow flurries, but who knows what the day will actually bring!
That reminds me. We need to bring the sheets of rigid insulation stored in the garage, back to the house. We’ll have to find a better way to get the sheets for the sun room windows to stay in place, though. At least this winter, we won’t be keeping the doors to outside propped open for the cats to go in and out, now that they have their own heated house! :-)
Lots to do before winter sets in, that’s for sure! :-)
Well, most of what I intended to get done today, happened. Plus, some unplanned stuff got done. :-)
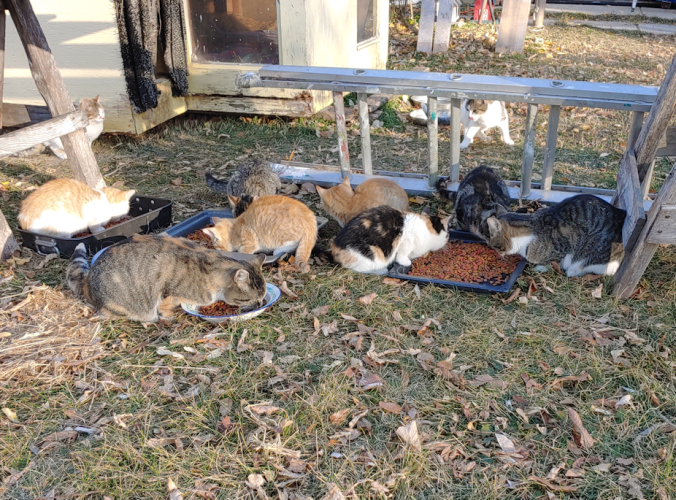
There was quite the crowd around for breakfast – and not all of them are in this photo! Most of them came out of the cat shelter, which was quite gratifying to see.
They were hungry enough that the little kittens allowed me to pet them while they were eating, including the calico. I was also able to finally confirm that both orange tabbies are male. That leaves the two bigger kittens (behind the food bowls in the photo) that we don’t know the gender of, yet. We’re really hoping they are males, because we have had zero progress in getting those ones more socialized. At least with the little calico, there is some hope we’ll be able to get her inside before she goes into heat.
The water bowls were all frozen this morning, so I brought out some warm water for them. The cats really appreciated that! I’ll have to get that heated water bowl set up soon.
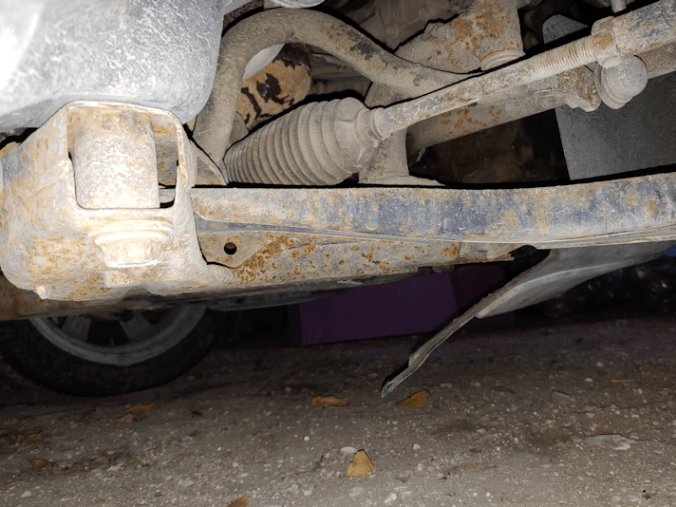
While doing my rounds, I remembered to try and get a photo under my mother’s car. It took quite a few tries!
The last time I drove it, I noticed something was loose underneath. I only saw it because of how I happened to be parked in an otherwise empty parking lot, as I walked to the car from a store. From a distance, I could see something hanging down near the front passenger tire, but once at the car, I had to look through the tire rim at just the right angle to be able to spot it.
When it was time to go to my mother’s to help her with errands, I left early so I could stop at the garage near her place. It is just a plastic shield, and it looks like a bolt probably vibrated off. Who knows when that happened, but it had to be recently, since I picked it up from the garage not that long ago. I have no way to get under there myself, but it’s such a small job, I didn’t even need to make an appointment to get it worked on. I was told to just give a call in the morning, then come on over. I will do that as soon as I can, so I don’t have to make my mother clamber up into our van anymore!
I was able to help my mother with several errands, and even get a bit of a visit. I was happy to see the mask exemption card I’d taped to her door was still there. Her municipality has a mask mandate right now, so we did get asked a couple of times if we had masks. Since I was with her, I was able to tell them we had medical exemptions, and there was no problem. Interestingly, while at the pharmacist’s counter, where they didn’t even bat and eye over our lack of masks, my mother did fish out a surgical mask from her pocket and put it on, saying she didn’t want any trouble – except no one was giving her trouble! I just cringed, because she has no ability to put one on properly. She only kept it on for maybe a minute, probably less. She didn’t even try to put it on when we got to the grocery store. I’ve helped my mother shop often enough, and the staff knows her well enough, that they talked to me about the masks, not her. It all worked out well. It was a real relief for me, given how much she struggles to breathe with a mask on. She still has a hard time understanding mask exemptions, and I could see she was concerned about being given a hard time, but the staff at all the places we went to were awesome. I did give her an exemption card to carry, but I have no idea what she did with that!
Once my mother was all set, I headed home and was expecting to hang the replacement door for the sun room back up. I wasn’t able to get another set of hands to hold it for me, so I instead worked on some cutting I needed to do. I had found a board in one of the sheds that I cut to length to make a couple of shelves in the entry. The pieces now just need some sanding and painting.
Then I started on cutting pieces that will be the frame for a cat kibble house. :-D
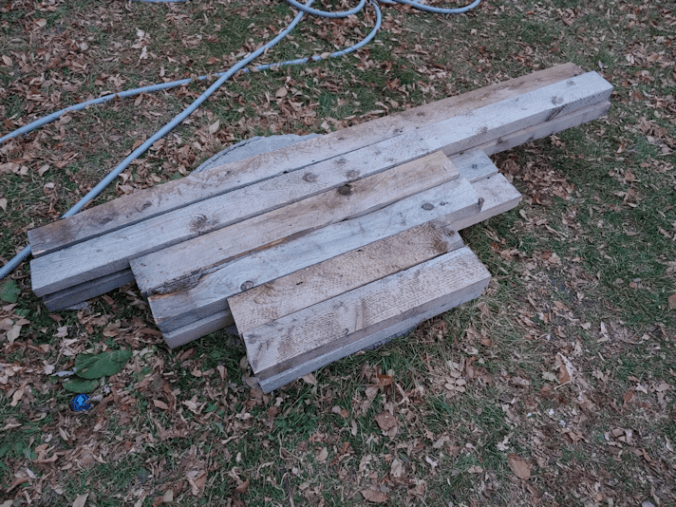
I’d made a rough and flexible plan for it. For the frame, I am using the pieces of wood from the frames I’ve been using to mark out garden beds. I also had a couple of extra long pieces we never used when we built the goat catcher.
I ended up changing the dimensions a bit, based on the wood I had available. All the pieces had one end slightly more damaged than the other, so I worked around that when making my measurements and cuts.
The short end pieces from the dismantled frames will be the upright pieces for the cat kibble house. The back pieces are 3 feet long, while I decided to make the front pieces 3 1/2 feet, instead of the 4 feet I was originally thinking of doing. The longer side pieces of the dismantled frames will be the length of the kibble house. I actually measured the group of kibble bowls and decided to make it 6 feet long, instead of the 5 feet I was originally thinking of. I then used the cut off pieces from those to cut cross pieces that will be the depth of the kibble house. They weren’t long enough to do the 2 1/2 feet I’d originally considered making it, so I cut them 2 feet long, instead.
I cut 4 of them, though I only need two, just in case I need extra.
The only pieces I haven’t cut yet will be the support for the roof. I will decide on the length of those later. I want a considerable overhang on the front of the roof. It can’t extend too far, though, because then it will be in the way when trying to reach the kibble bowls inside.
As for the roof itself, I’ve been finding sections of plywood in the barn and sheds that I should be able to salvage. Once I decide on how long of an overhang I want, I’ll have the dimensions I need to hunt out a piece that will fit.
The kibble house will also have a floor and three walls. For that, I plan to use wood salvaged from the junk pile. The pieces are pretty inconsistent in size, but it doesn’t have to be perfect. It just needs to be enough to keep the bulk of the wind and snow out. The roof will be the most important part.
As you can imagine, the noise of cutting the pieces spooked the cats quite a bit. Some of them, however, were spooked into the cat shelter. As I was putting things away, I looked to see that the indicator light for the timer was on. I could also see a little calico kitten, curled up under the heater! I am so glad the little kittens are using it. They are the ones I’m most concerned about for the winter!
Unfortunately, other critters have discovered the shelter.
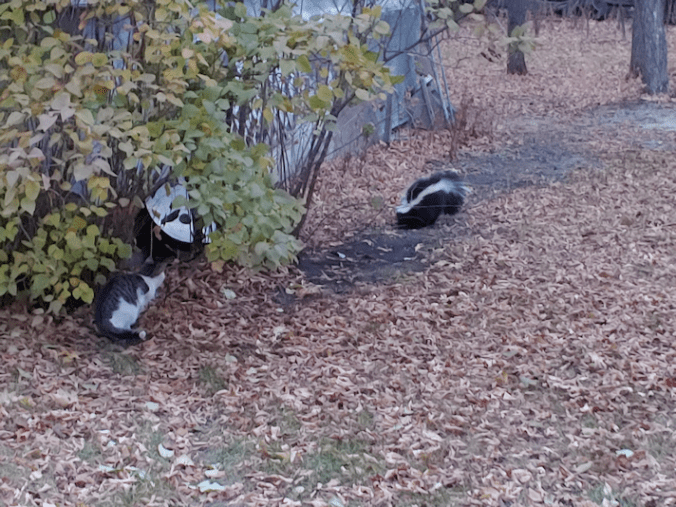
Stinky came by as I was cleaning up! I had unhooked the hose, though it was too cold and stiff to put away, so I screwed it back on and used it to spray the skunk away. Long before the cats were willing to check out their new shelter, I could tell from the smell that Sir Stinks Alot had already visited. Nicky the Nose – the only one of the big toms that still visits regularly – has been seen coming out of it, too. We’re trying to discourage him from visiting, because he has been attacking our own male cats. Especially Creamsicle. :-( If he’s in there, chances are he will chase away some of our own cats.
He’s also the daddy of way too many kittens!
I have come to the conclusion that Nicky the Nose is deaf, or at least mostly deaf. There have been a few times I’ve come towards him, even talking as I walked, while he was facing away, with no reaction. It isn’t until he turns his head and sees me that he reacts and runs off.
Tomorrow, barring some unexpected change in plan, I will continue to work on the cat kibble house, and hopefully be able to snag a daughter to help hang the sun room’s replacement door.
It’s starting to get pretty chilly out there, and there’s still plenty we need to get done before the real cold hits!
After three weeks (and a day) the crab apple cider vinegar has been strained.
For those new to this blog, you can catch up on the process by clicking on the following links. Each should open in a new tab, so you won’t lose your place.
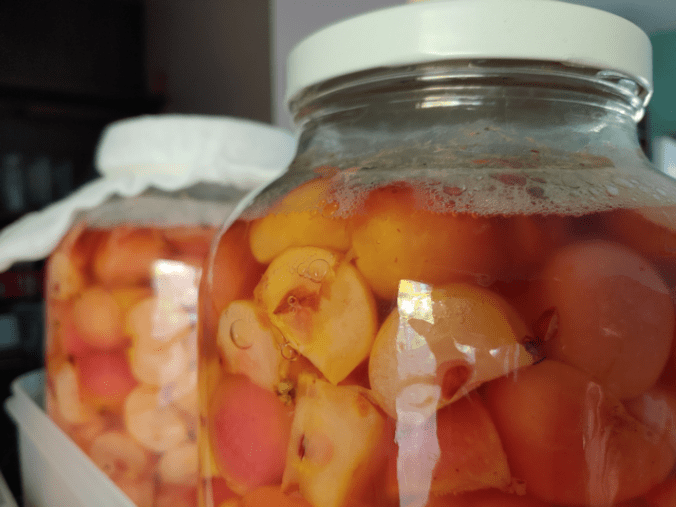
While I have not been checking on them every day, I have been checking regularly, and the last I did, it they still looked like this.
So it was a bit of a surprise when I brought the jars over to strain them, and saw this.
Oh, dear.
Both jars appeared to have mold at the top.
Now, part of what we’re doing this year is seeing if there’s a difference using cheesecloth to cover the top, or an airlock. Theoretically, because the cheesecloth allows oxygen in and an airlock doesn’t, the one with the cheesecloth should have been worse.
When I opened them up, though, there really wasn’t much difference. They both looked like this.
Yeah. Gross.
It seems the glass weight I used was not large enough to keep all the apple pieces below the level of liquid. Why it was enough to do so for almost 3 weeks, I don’t know.
On taking out the glass weight, I found that the pieces still immersed looked fine.
After scooping out the pieces at the top, the ones below all looked fine. The photo on the left is the jar that had the airlock, the one on the right had the cheesecloth.
I see no difference at this point.
After straining the pieces out, I checked them, and everything still looked fine. It was only the very top pieces that showed mold.
Took keep the experiment going, I made sure to do each jar from start to finish separately, cleaning and sanitizing the jars (and the airlock with its lid) before pouring the baby vinegar back.
The vinegar on the left is from the airlock jar. The one on the right is the cheesecloth jar.
Again, I see no difference between them.
Both of them also resulted in 2L (about half a gallon) of baby vinegar. If I weren’t testing the two different tops, I would have poured it all back into just one jar.
One thing I noticed very quickly when straining them, is that they both have a surprisingly strong alcohol smell. A rather pleasant one! I might have a bit of hard cider going at the moment!
No, I didn’t taste them.
The question is, will the mold that was at the top be a concern? Will the continued fermentation – which is really just controlled decomposition – eliminate any potential problems?
There’s only one way to find out.
Back they go to the old kitchen, for another three weeks. Then it’s tasting time before deciding to let it ferment for longer or not.
These are supposed to stay out at room temperature. Room temperature in the old kitchen is a fair bit lower than the rest of the house – which isn’t particularly warm, either! When I brought the jars over to strain them, I used the temperature gun and they were both at 12C. If we were wanting to make an alcohol, that would be too cold, but is it too cold for a vinegar?
Yesterday, we hit 27C/80F. An unexpected result of that is, all number of house flies and other flying insects emerged from wherever they were slumbering in the previous cool, and got into the house.
Which meant a night of cats making a ruckus while chasing bugs all over the house.
I got very little sleep.
Today was much cooler, but rather than being outside, taking advantage of it, I ended up passed out for a couple of hours.
Cuddled by a couple of cats, of course. The buggers! It’s a good thing they’re so cute.
Anyhow.
While puttering about the house, trying to get at least some productivity in, I was in the old kitchen and checked on the apple cider vinegar. It’s been a couple of weeks since I started – or should I say, restarted – them, so I figured it was time for a progress report.
For my new followers (welcome! Happy to see you here. :-) ), you can visit our first making of apple cider vinegar with our crab apples here. This year, we decided to make a larger quantity, with some experimentation. You can read about our first attempt here, and after discovering I made a really silly mistake, the reboot is written about here. (All links will open new tabs, so you won’t miss your place. :-) )
Here is how the jars look now.
The old kitchen is a very dark room. The south facing window has the sun room in front of it, so it doesn’t get any direct sunlight. The west window, which would normally provide a lot of light at the end of the day, is covered with aluminum foil (which predates our moving here), so there is zero light coming through there. The north facing window is what’s providing what light you can see in the above photo. Without turning the light on in the room, it was too dark to get a photo without moving to the window side of the jars.
This is a good thing. The instructions said to put the jars in a cupboard, and we just don’t have any with the space for these jars, so a room that never gets bright works just fine. The concern I had was how cold this room is. Fermentation requires warmth.
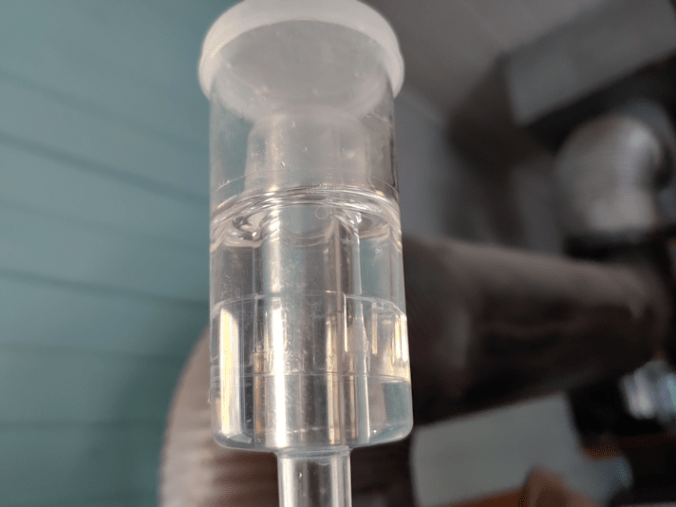
As you can see, there is no activity in the airlock at all. If there had been, the plastic cap on the inside would have been pushed to the top as it filled with CO2.
However, this is not the same as fermenting alcohol, so not seeing activity in the airlock does not necessarily mean nothing is happening.
And things are most definitely happening in there!
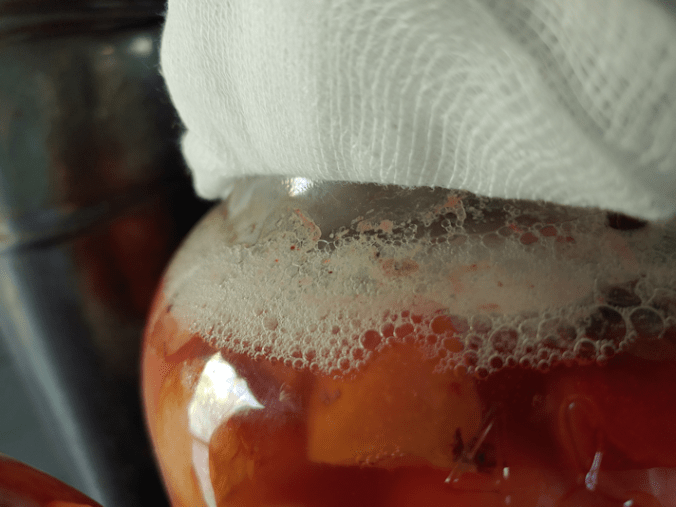
Both jars look the same. At this point, I see no difference between the one with the airlock and the one with the cheese cloth. Both have this layer of bubbles at the top, and when turning the jars to check them, more bubbles enthusiastically make their way up the jar. There most definitely is active fermentation going on.
One good thing about doing this in the larger jars like this: it’s nowhere near as messy as our first attempt! The fermenting vinegar had bubbled up enough to reach the coffee filter covering it and leaked a bit, inviting all sorts of fruit flies to check things out. This year, had I not had to throw away the first batch, with the its very full jars, it may well have bubbled up, and the one with the cheese cloth, at least, would likely have had a mess. There may be more headspace than needed in these jars now, but it seems to be better that way.
There also doesn’t seem to be any sign of mold or rot or anything of concern. The glass canning jar lids being used as fermentation weights are doing the job of keeping the floating apple pieces submerged.
So far, everything is looking good!
Next week we’ll hit the 3 week mark and, according to the instructions I’m following, that’s the time to strain out the apple pieces, return the vinegar to the jars, and let them sit for at least another 3 weeks.
I’m very curious to see if there will be a noticeable difference between the two jars.
Last year, we made apple cider vinegar using the bright red apples from just one tree. The result was a delicious, delicately pink cider vinegar, and we were looking forward to making it again.
There was just one problem.
The instructions we followed said to put the jar in a dark place, so we tucked it into a cupboard. Unfortunately, it attracted fruit flies. The jar was covered with a coffee filter and they couldn’t get in but, as it fermented, some had bubbled up enough to dampen the paper. Which meant any time we opened the cupboard, we’d find a cloud of fruit flies inside!
Not good.
Since then, we’ve bought the things necessary to make mead. This includes smaller bungs to fit airlocks into gallon jars. We will be using some to make hard apple cider out of our crab apple juice, later. With airlocks being so cheap, I’ve picked up extra, so we could have all our gallon jugs, plus the 5 gallon carboy, all going at once, and still have extras.
This year, I will be taking advantage of our mead making supplies.
Since making the ACV requires using apple pieces, I need to use a wide mouth jar. I also want to make more than last year, so I wanted to use something bigger than a quart jar.
Every now and then, we picked up the big gallon jars of pickles at Costco, and I’ve been keeping the jars. That’s what I’ll be using to make the vinegar this year.
The question then becomes, how do I use an airlock on one of these?
Now, if I had some silicon grommets (which I learned the name of only yesterday), I could drill an appropriately sized hold in a cap, pop on a grommet, and insert an airlock.
I don’t have those. I do have extra bungs, though.
I don’t have anything I can use to simply drill a hole that big into a cap, though, so I had to do it the use-watcha-got way.
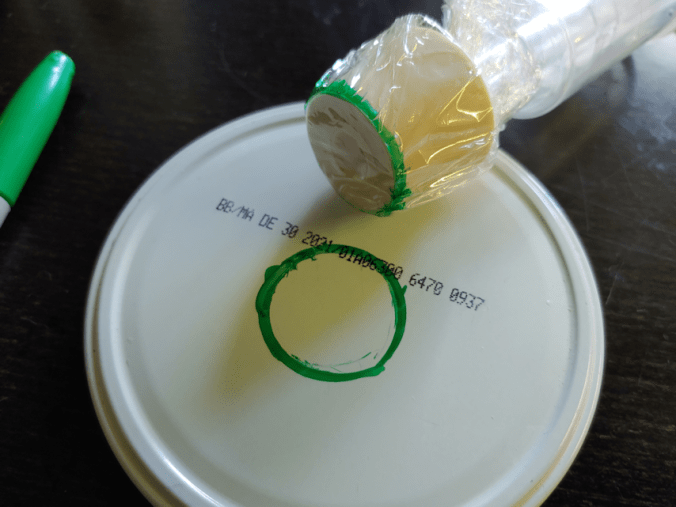
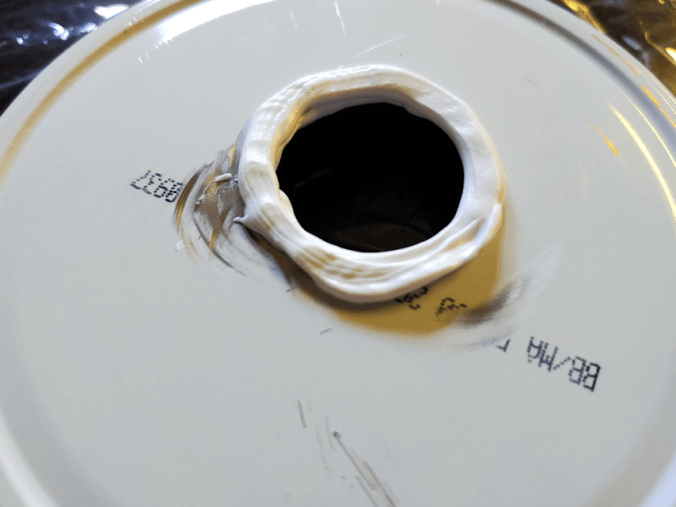
The first thing to do was mark the size of hole I needed. After protecting the bung with plastic wrap, I traced around it with permanent marker. As the bung is tapered, the actual size of the hole needs to be slightly larger than the inside of the circle.
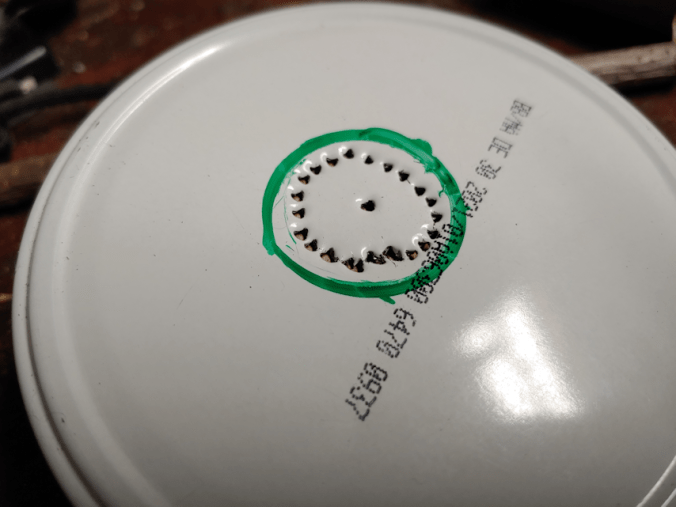
With a scrap of wood underneath, I punched a series of holes well within the marked circle, then used pliers to break off the middle.
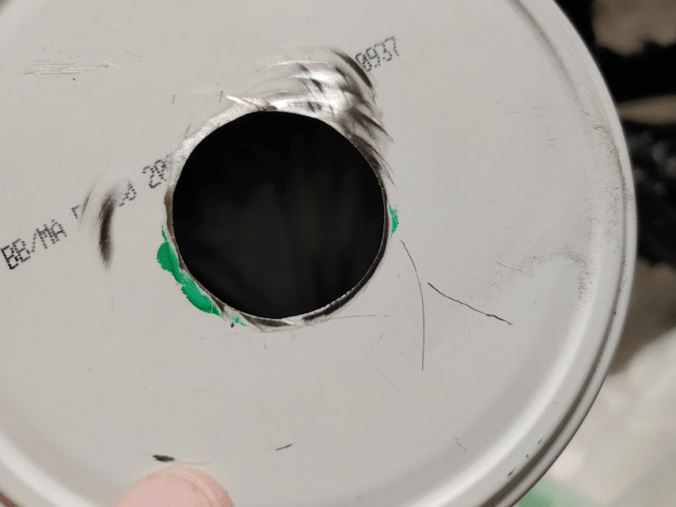
Working directly over a garbage bag, I used a series of metal files to grind away at the opening to smooth it out, then make it larger.
Once I’d reached the inside of the marked circle, I switched to the Dremel to grind and smooth the metal.
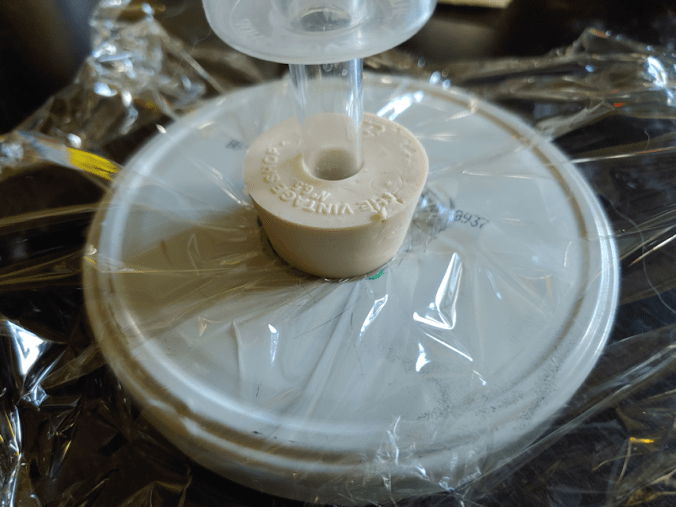
Then it was time to test the size of the opening. A perfect fit!
We’re not done yet!
Though the metal was ground smooth, it still is sharp enough to potentially damage the bung, if I were to push it in tight enough to great a proper seal.
Silicon sealant to the rescue!
I used the same stuff we got to fill screw holes when our satellite dishes got moved, then again, for a final seal in the cracks on the rain barrel we set up by the garden. It’s a multipurpose, indoor/outdoor product that is coming in very handy.
The tube it comes in is also very easy to control, even for a job as small as this. After giving the cap a very through cleaning, I lay a bead down on both sides of the cap, right on the edge of the hole, so that top and bottom would touch and completely cover the metal edge. Basically, I imitated a silicon grommet. This should both protect the bung, and ensure an air-tight seal is created.
Now it just needs time to cure before I can test it again with the bung.
Since we have so many apples, I might make two; one with the airlock, and one without, to see which works better. I’ve also picked up some fancy-schmancy ACV “with mother” to use as a starter (last time, we just used water and sugar). Using just a coffee filter, it relies on exposure to the air to get the bacteria needed for fermentation. So it’s touch and go, whether you get a good bacteria or not. With an airlock, it won’t get that exposure, so using a vinegar with the mother in it will ensure the right kind of bacteria is already in there.
Today I found myself heading into town for a trip that included a stop at the hardware store. I took advantage of being there to look for some Dremel tips.
The didn’t have the individual tip I was looking for.
I ended up getting this, instead.
I think I’ve got enough tips for quite a few projects, now! :-)
So, of course, I had to find a reason to use it. :-)
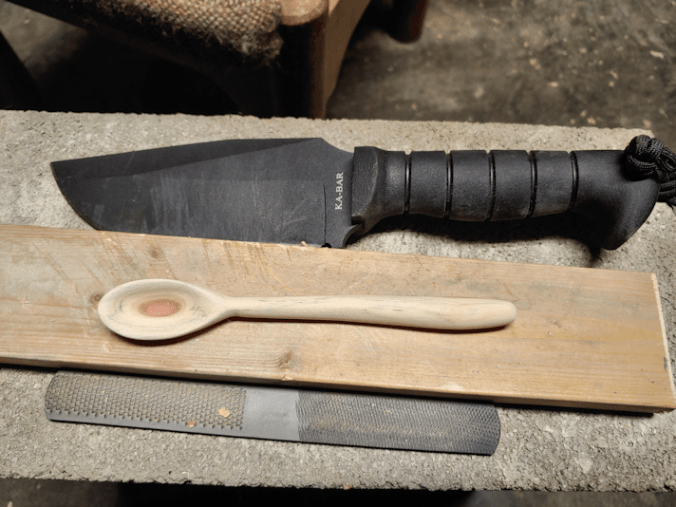
A while back, I posted about making a maple spoon.
You see that chunk of wood beside it?
That’s what I worked with, today.
This is that same piece of wood, roughed out.
Not for a spoon, though. Today, I was determined to make a fork!
For this project, I used everything I had around to remove the excess wood. The 4 way rasp got a lot of use, but I also used several of my new Dremel tips, the big K-bar knife, and a couple of my fine saws.
Basically, I see no point in dulling the blades on my carving knives any more than I have to! :-D
I saved cutting the tines for when I was ready to start using sandpaper on the rest of it.
I used a carving knife, as well as a fine tip on the Dremel to shape the tines.
Unfortunately, while sanding them, the wood broke off the tip of one of the inside tines.
Which meant I had to shorten all the others to match.
Here it is, after sanding.
Front
Back
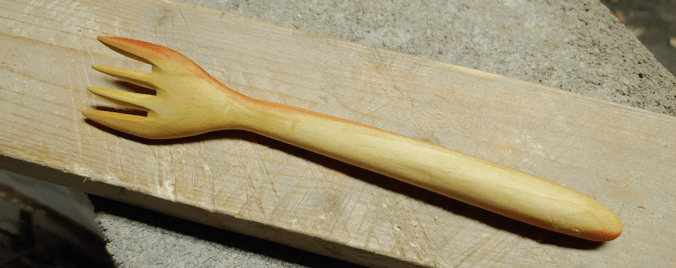
The end result is the wonkiest of forks!
But it’s still a fork. :-D
Here is it, after oiling.
Front
Back
Oh, gosh, it’s the funniest looking fork, ever! :-D
Here it is, next to the spoon made with the same wood.
The spoon could use another coat of oil!
Well, I at least accomplished what I set out to do. Even if it does look totally wonky!! :-D
I still have wood left from the piece I used for these. I suppose my next project should be a knife. :-)
Today was another hot one, which made it a good day to finally go into the basement and see what I could do with the various pieces of wood I’ve brought down there.
Since getting my wood carving kit, I haven’t had much chance to make things with it. I used the spoon blank it came with for my first attempt. Then I used some of the lilac wood pieces to make a hair pin for my daughter. I have since made a longer, plainer lilac hair stick for my daughter, and tried to make one out of cherry for myself.
I say “tried” because when I got a bit decorative at the thick end, it ended up breaking, twice. The inner core of the piece of cherry I was using was rotted just enough that when I tried shaping the wood, it was just too weak. This was true of the lilac wood, too, but I hadn’t tried to carve anything that would affect the integrity as much, so they were fine.
Today, I wanted to make something with some of the maple pieces from the tree I had to cut part off, earlier this year, so it would be safer for my brother to move around on the shed roof he was patching.
I had a branch of it set aside, waiting for a day like today, and I cut a short piece to work on.
I was thinking of going very simple, and making a spreader or something like that.
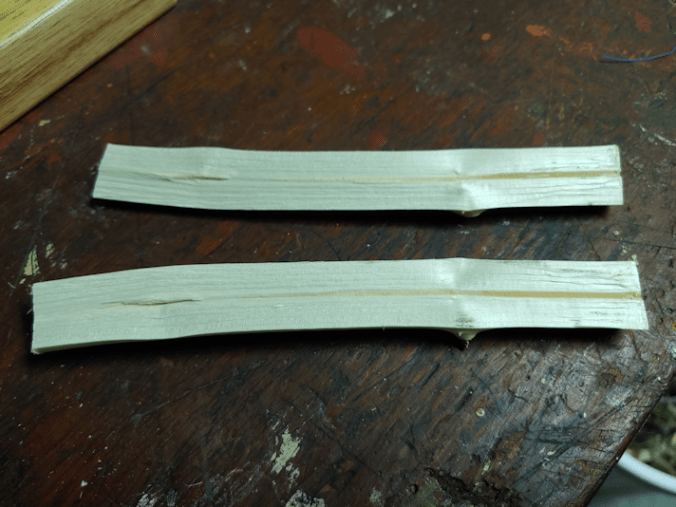
Thinking of the lilac and cherry wood, though, I decided to split the piece and see what it was like on the inside.
Well, crud.
I’m not going to be able to make a spreader out of that.
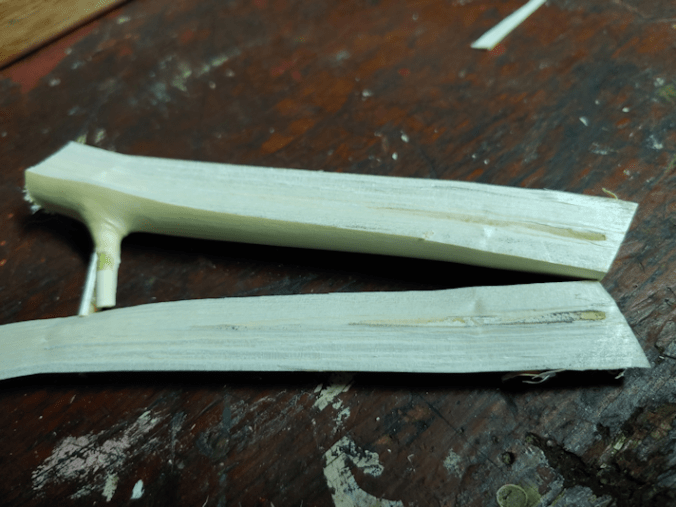
So I cut a piece from a larger branch I had set aside.
Dangit!
I really hope it isn’t all like this. The stuff I want to make uses the heartwood. For the larger pieces, I’m thinking of cups or bowls. Stuff I plan to actually use.
In fact, there was a particular piece of dead maple I’d found while cleaning up the maple grove, I think in our first summer here, that I was looking forward to using.
It doesn’t look like much on the outside, but when I cut it, this particular maple had red rings inside it.
I cut a piece off the end and took a look.
That does not bode well.
So I split it.
*sigh*
Yup. The middle is rotted.
However…
What about the edges? The parts with the red it in still looked solid.
So I split it again.
It did not split well, but the wood did seem pretty solid. Could I do something with this?
I wasn’t sure.
Over the next hour and a half or so, I hacked at it with a giant knife (which I’ve been using in lieu of a hatchet), decided to try the sloyd knife to carve out a spoon bowl, gave up on that and tried the Dremel (the two different tips I tried did the job, but the friction actually charred the wood!), finally broke open my new set of rasps and used a bar rasp with 4 different surfaces, and yes, even the carving knives.
Part way through, I dragged one of the chimney blocks from the old basement to use as a lower, solid surface. Especially for when I was hacking away with the big K-bar.
So that hunk of wood up there?
This is what I got out of it.
I didn’t stop to take any photos while I was working on it because, to be honest, I didn’t think it would work!
So here, I am at the stage of using my coarsest grit sand paper.
As I moved up to finer sandpaper, I would sometimes use my little vice.
You can really see the gouges left by the rasp. The vice made it much easier to just use a narrow strip of sandpaper around the handle and pulling back and forth.
Working my way through ever finer grits of sandpaper took probably another hour and a half.
Sanding the inside of the bowl was the most difficult. While I could use the curved sloyd knife a bit, the wood was really too small for the blade. What I really needed was a wood gouge, but I don’t have one. So that’s where the Dremel came in handy, to get the bulk of the wood out of the bowl, but I still had to cut out the bits that charred from the friction and shape it. I ended up using the other carving knives more than the sloyd knife, because of that.
Here it is, after final sanding.
You can see on the scrap wood, where the knife was hitting while I was chopping away the excess wood on the spoon. :-D
I also included the bar rasp, to show the different surfaces.
Of course, I just had to get a picture of it next to a piece of the wood it came from.
I still can’t believe I was able to get this out of that chunk of wood!
As I was sanding it, I noticed black showing up in the non-red parts of the wood.
Having done my research before I started with my first attempt at carving, I recognized it as spalting. There are people who go out of their way to use spalted wood. It’s basically a sign of the wood’s decomposition.
It was very faint as I sanded, but how would it look after being oiled?
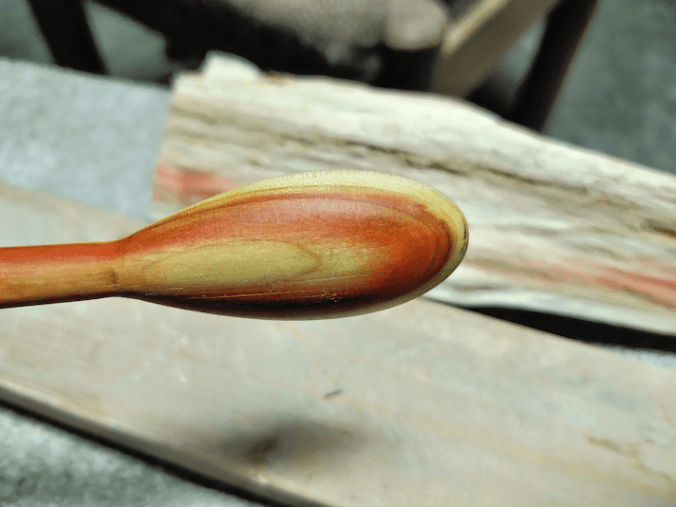
And how would that red show up after being oiled?
Let’s find out!
Wow!! What a difference!
I could have cut this part out, but I kind of like it.
Unfortunately, I find the spalting makes it look like it’s dirty. :-(
On the back, you can still see some of the roughness of the would that I didn’t quite get rid of completely. They look a bit like scratches on the lower part of the spoon. The part that became the outside of the spoon bowl had some chunks missing from how the wood split. It meant less excess wood to remove in that area, at least.
So this experiment was a lot more successful than I had dared hope! Not only was I able to get something out of a partially rotted piece of wood, but I was able to start and finish a spoon in one sitting!
One of these days, I want to try making a fork. :-)
I am happy to say that I got the window for the old basement built – with considerably kitten interruptions!
While I did that, the girls installed the new kitchen faucet set. It turns out there are no shut off valves on the water. They had to shut off the main valve for the entire house.
On the list of things to do: add shut off valves all over. I’m pretty sure the bathroom sink doesn’t have any, and I know the toilet doesn’t. In following the pipes through the basements, the only valves we found where the ones for the outside taps, that just shut off every winter.
Also, the cold water pipes and well pump are all just dripping with condensation!
So we now have a nice, tall faucet on the sink that we can actually fit my big stock pots under. :-)
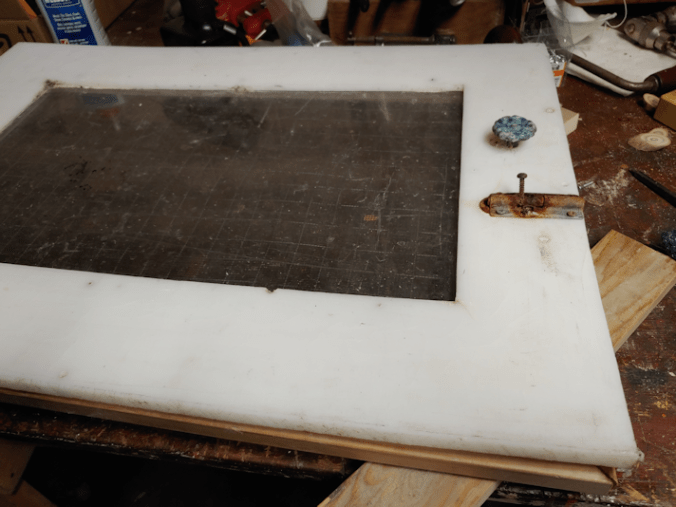
As for the window, this was my template.
As you can see, I have an enthusiastic helper!
This is the window we leave on throughout the winter, with 3 inch thick foam insulation on the inside. When it warms up, we would take it out and place a wire mesh “window” over the opening to allow air circulation to help keep the basement dry. It is much bigger than the window opening, and the wood framing the metal mesh is old and rotting. It finally broke apart last winter. Right now, we still have it leaning on the wall, but with the broken frame, critters could easily squeeze through, to the insulation is still in the window opening.
I used a piece of some of the wood I’d brought from a shed and used to make the screen door so we can leave the old basement door open. One piece was enough, even after cutting away the water damaged end.
I used the window to size the pieces, then double checked the sizing after cutting. The back of this window has self-adhesive foam weather stripping around the edges, but half of it is missing, so the pieces can’t lay flat, but it’s close enough.
Also, it’s very interesting to use a miter box with kittens trying to climb all over me and my work table! I had some trying to chew on the miter box, while others would take flying leaps at my legs, then climb up onto my shoulders.
The little beasts! :-D
The next step was to ready the right angle plates I got for this.
This was my original plan; I’d use a combination of wood glue and these plates to secure the corners. I thought to put them on the inner edges of the corners, first, but changed my mind and decided to put them on the outer edges. I marked out the screw holes so that I could drill pilot holes, later.
It…
Didn’t work.
I started by using wood glue on a corner, then putting on the plate, only to discover the screws I had were a fraction of an inch longer than the wood was thick! It was juuuuuusssssttt enough that I screwed the corner to the table a bit.
The other problem, however, was my pilot holes. They were shallow holes; I just wanted enough to make getting started, easier. A few of them ended up being ever so slightly off centre, then some of the screws started going off on angles.
The end result was that the angle plate ended up making the corners less squared!
So I took off the couple I’d put on and left it for later. I had already glued the pair of corners, which were supposed to be clamped for 10 minutes. I don’t have right angle clamps. One didn’t really need it, but I did end up using a C clamp on the other.
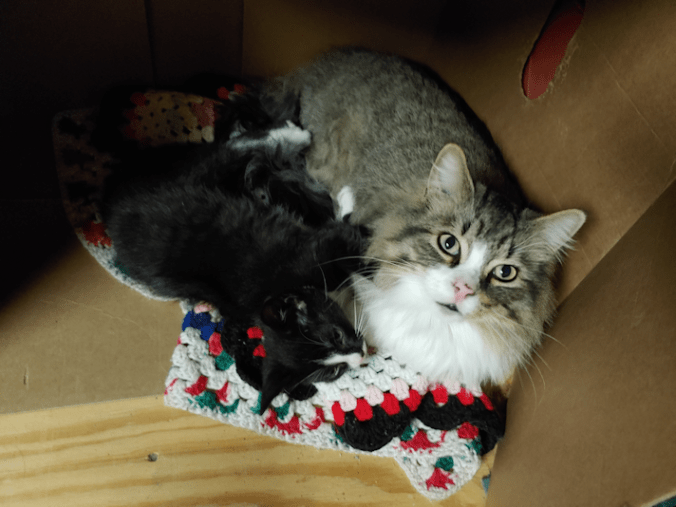
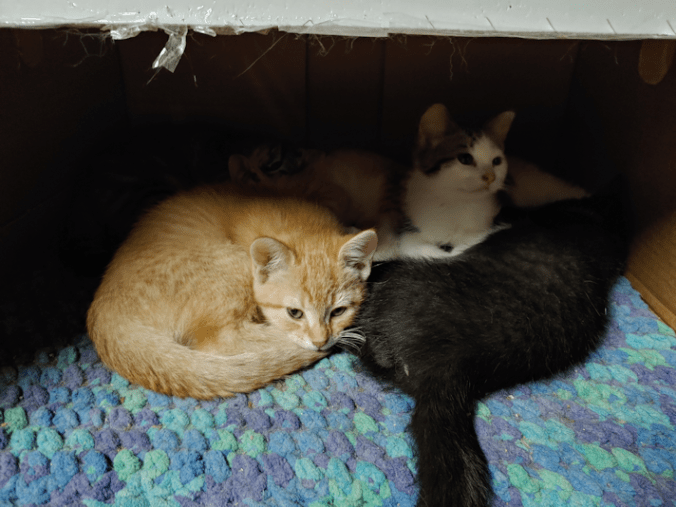
It was a good thing I had to wait for the glue to set for a while, because at that point, I was being thoroughly loved on and cuddled by Big Rig. Then Leyendecker joined us. Then they fell asleep on me! After a while, Big Rig took off, but Leyendecker stayed. I finally had to move, and discovered David settled in one of their box caves, so I put them together – and Leyendecker stayed!
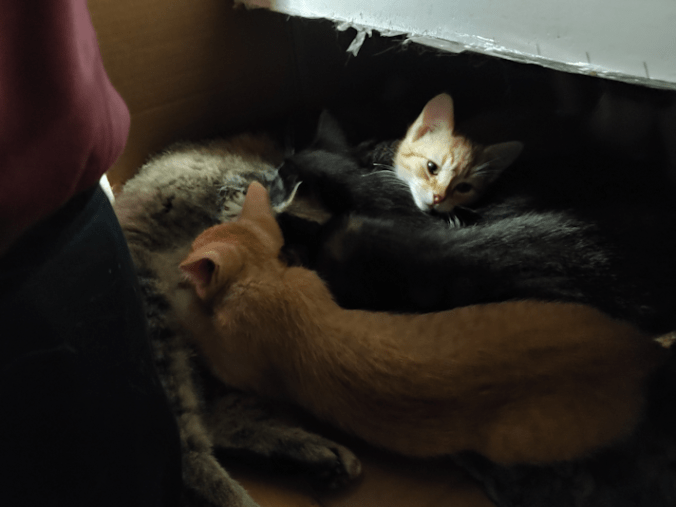
Until my husband came down, and he ended up with kittens nursing behind his butt. :-D Finally, Beep Beep got tired of that – and she joined David!
David is such a sweetie will all the cats and kittens!
I was, eventually, able to continue with the window. :-D
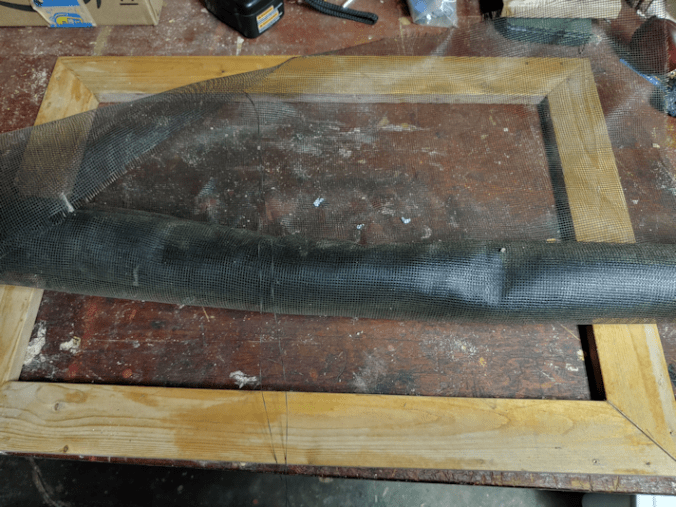
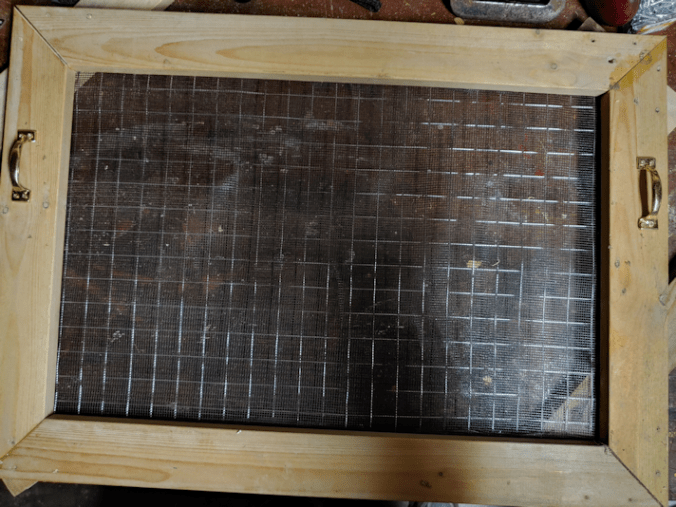
One of the things I found among the many, many things shoved onto the support beam, between the floor joists above, was a roll of window screen. I dug it out and, after gluing the remaining two corners of the frame, used it to measure off a piece of screen.
I actually ended up throwing away the first piece I’d cut, as it turned out to be damaged.
I don’t know how long that roll had been sitting there, but it was just caked with dust!!! Enough to make unrolling it very… sticky. :-/ I cut the mesh larger than the frame, so that I could fold the edges in, for extra strength.
I also cut some of the wire mesh to size.
After fighting with the window screen for a while, trying to get the edges folded under, it occurred to me that I was working on the “pretty” side of the window frame, and that the screen and wire mesh needed to be on the “ugly” side, that would be facing inside the basement.
No, the wood glue wasn’t dry enough to hold, yet. Which was fine. After I flipped it, I just stuck it back together and kept going.
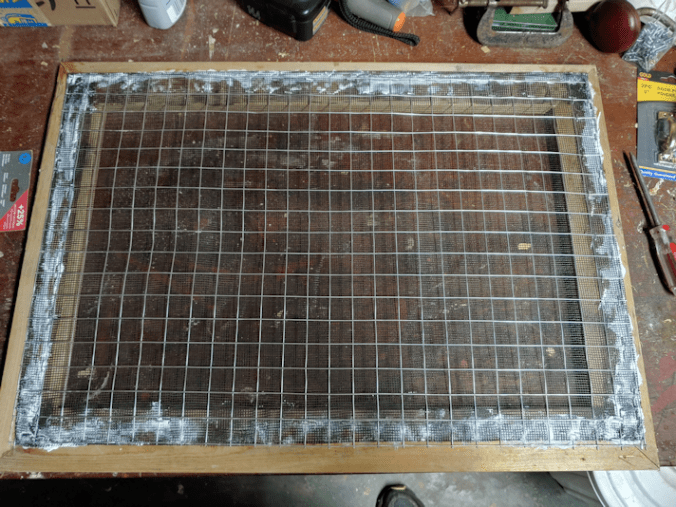
It took away longer to get those edges to fold under than I expected! Here, I’ve tacked the screen to the frame at the corners with a staple gun.
Once it was tacked in place, I got out some Weldbond adhesive and applied it to the edges, then used a cast off piece of wood to spread the adhesive and push it through the screen.
Then I added the wire mesh.
I was going to say I went overboard with the staple gun, but to be honest, I seriously considered adding even more. Every wire around the edge has a staple, alternating between the outside edge, and the next wire in.
The corners each got at least 4 staples. :-D
I’m hoping that, between the Weldbond and the staples, no critter is going to be able to force their way through.
I wasn’t gone yet, though!
Remember those plates?
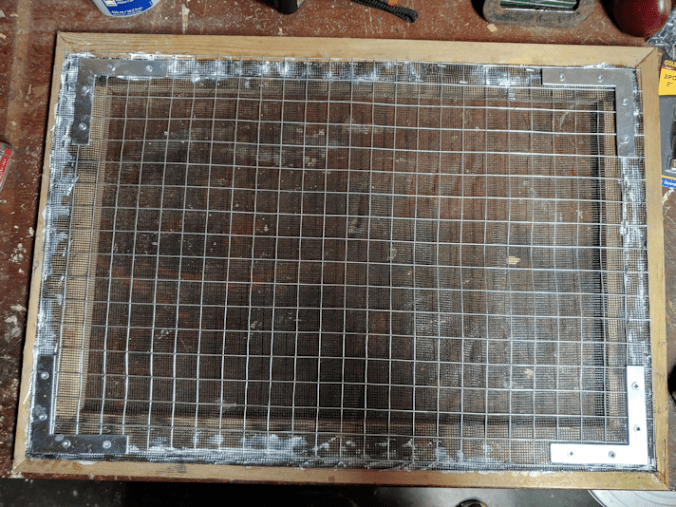
It took some hunting, but I did find some shorter wood screws to use. The plates were positioned based on the wood based on where the wire was. As long as the point lined up with the corner joins, I just needed to not have a wire in the way of the screws.
Between the plates and the wire screen, this frame is not moving!
Next, I needed to add handles. I used cast off pieces of wood under the metal plates, to keep the adhesive off the worktable. I’d already accidentally screwed it to the table. I didn’t want to glue it, too! :-D
The weather stripping on the back of the window wouldn’t let it lie flat, but I could at least line up the edges. I then marked the sides of the new window frame at the latches, and at the knobs.
I then added the handles with the bottoms lined up with where I’d marked the placement of the knobs.
The latches on the window fit into holes in the window opening outside. Once in place, the window is flush with the wall around the window opening. The wood is much thicker than the plastic, so I know at the very least, it will stick out from the wall. What we might end up doing is adding another pair of latches, so the outside of that window opening will have the fittings for both windows on them.
We’ll make that decision later, though. It will all depend on how it fits.
For now, the window is finished. I’ll leave the adhesive to dry overnight, and tomorrow, I’ll see if I got it right and it fits – or if I screwed up! :-D
Once I know how it fits, we will be able to see what would work best for fastening it in place.
After that, the only thing left will be to paint it. We have several things that will need painting, so we’ll wait until later in the season and do all of them at the same time.
Happily, we are now able to cross a couple more things off the to-do list. The list isn’t going down as fast as I’d like, but it is going down! :-)