Coping with the heat: building a screen “door”

Our current heat wave continues.

At 5pm, we reached 28C/82F with a humidex of 34C/93F, and we continue to get warnings for heat, flash floods and high water. Looking at the weather radar, however, it doesn’t look like the storms will hit us. We’ll be lucky to get rain. Usually, these systems come in from the North West, dip to the South of us, then get pushed back north to the East of us. Sometimes, they pass to the West of us. This time, there seems to be strong enough winds coming from the Southeast to actually push the system back to the Northwest of us!

The long range forecasts are not showing much relief, either. We’re looking to stay in the mid to high 20’s for the next two weeks. The only relief is that the lows are finally dropping to the mid to high teens, instead of staying in the 20’s, as they have been lately.

With this house, typically the basements stay cool, the main floor gets warm, while the second floor gets insanely hot. With the temperatures being so consistently hot, even the basements are starting to get warmer, though they are still significantly better than the rest of the house. The upstairs is getting unbearable. My daughter just had to stop working and shut down her computer, because it was over heating.

Normally, to help keep the house cool, the basement doors would be left open. With needing to keep the cats out of the old part basement completely, and keep the kittens in the new part basement, we have not been able to do this.

Last year, we used my daughter’s grid wall to act as a barrier in front of the old part basement door. The doorway is wider than a panel of grid wall, so we had two of them hooked together, at an angle. It did the job, but was very much in the way.

Today, I decided to do something about that.

After finishing my rounds this morning, I went into a shed not far from the barn, where I’d found some wood that was still in good shape. Some of them had 3″ deck screws in them, so I left those behind (though I did end up with a couple that had a screw at one end that I’d missed). The little wagon was great for bringing the pile over. :-)

Earlier, I’d also cleared away and hosed down the patio blocks in front of our kitchen window.
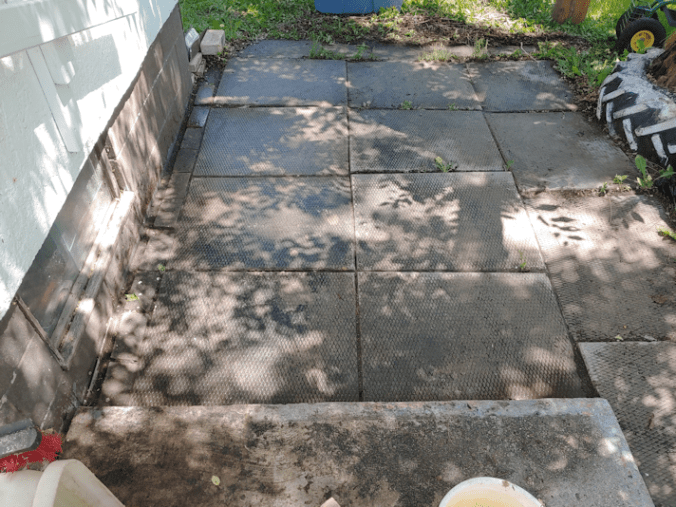
One of the things we need to do is build some sort of bin for our garbage bags, because the skunks are tearing them apart when we put them outside. Normally, there is a bench against the wall, and some other stuff, but when I cleaned up the mess and saw the gunk from however many times this has happened, left behind, I just had to hose it all down.

This meant we had access to the basement window.

It was much easier to pass the wood through the window, rather than trying to get it in through the main doors, then the basement door, then down the stairs.

All while dodging cats and kittens.

So this worked out very well.

I had enough of the wire mesh we’d used to make a divider between the basements, to make wire mesh door.

The kittens were very … helpful. Yeah. That’s it. :-D

I measured the basement door and sized it to match that. We were considering taking the door off its hinges and putting in the screen instead.

Of course, it didn’t quite work out that way.
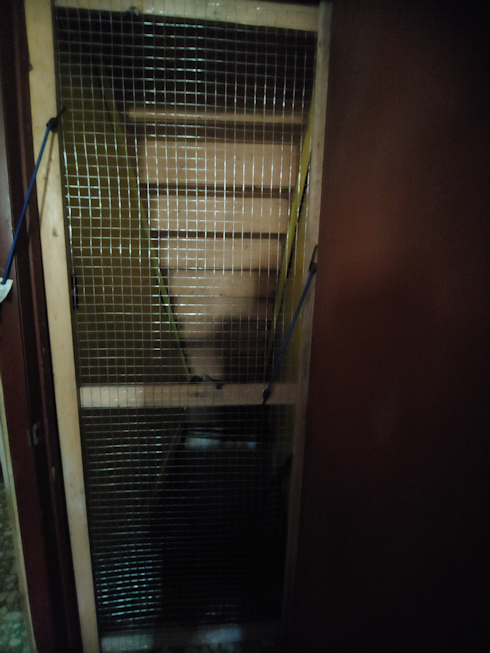
I had also considered putting it on hinges on the inside of the door frame, but it turns out the frame is narrower on the basement side of the door jam than on the door side.

Which makes no sense, but at this point, we’re pretty used to things not making sense in this house! :-D

For now, we’ve got it rigged up with hooks and Bungee cords. I will be going into town tomorrow, and am thinking of stopping at a hardware store and seeing what they’ve got that would work.

Personally, standing in front of it, I felt nothing. We have the big blower fan going constantly in this basement, trying to keep the floor relatively dry, but I felt no air movement at all. Later, my husband went by and said he could feel a cool breeze, so I’m hoping it was just me.

If we can work out how to secure this, so that cats can’t push their way through, I have enough of the wire mesh left to make another one for the other basement door. We could even hinge it to open into the entryway, instead of over the basement stairs. Which would be so much better!

It isn’t much, but every little bit helps to cope with this heat!

One of these years, I hope to get an actual air conditioner installed.

The Re-Farmer

Wood carving: lilac wood hair pin

I am actually not sure I would even call making this hair pin “carving”! I used the natural shape of the piece of wood, and just sort of whittled away a bit. The wood was already very close to the size needed.

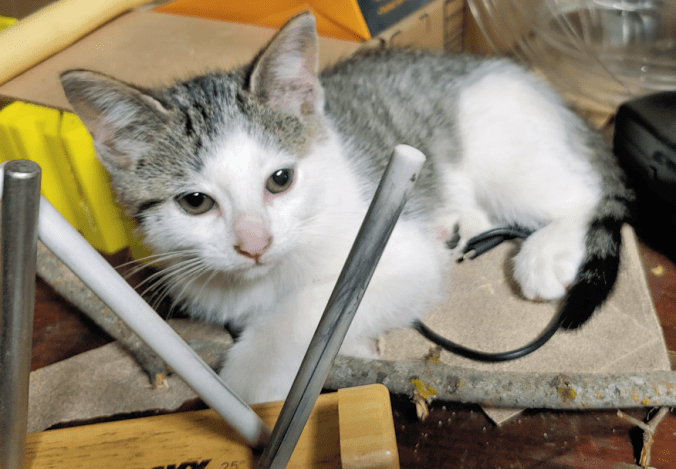
I didn’t take a “before” picture, but you can see what the branch I’d cut the piece from in this photo.

It’s being grasped by Nicco. :-)

Though the wood is from a branch that broke off in a storm more than 6 months ago, the bark was surprisingly green as I whittled it off. I think the humidity in the basement might actually have something to do with that.

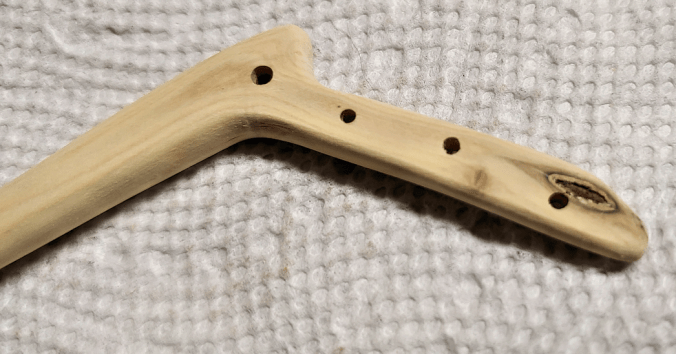
Here is the finished hair pin, before oiling.

I cut the piece above where it branched off, to take advantage of the angled shape. You can see near the point, where there had been another bit of twig growing out.

I used the Dremel and the engraving tip to create the holes, so my daughter can use them to hang dangle-y bits. The natural hole at the end was where another twig had been growing out, and I included it, without trying to sand out the roughness, just for interest.

The tiny knots from the twigs where the only thing that made it more difficult to work on.

After general shaping with a carving knife, I used the tiny engraving tip on the Dremel to make the holes, and a small drum sander tip to get into the bends, where it was more difficult to safely get into with a knife. After that, it was must a matter of sanding it smooth.

Here is how it looked after oiling.

I love how the oil brings out the details in the rings.

The whole thing, including time spent playing with kittens instead, took about 2 hours.

My daughter loves it!

I’m really happy with how this turned out, and how quick it was to make! I hadn’t thought of making hair pins (which can also be used as shawl pins), but they are prefect for some of the smaller pieces of branches. I think I’ll be making more of these!

The Re-Farmer

Carving progress: it’s finished!

I am happy to say that I have finally finished my first attempt at carving!

Yay!

My trip into town was successful, in that I found a teeny tiny tip for my Dremel.

Saffron made sure to check it out, too!

I discovered something when I went to put it on my Dremel, though.

It didn’t fit.

The shaft is too small. By maybe a millimeter!

Well, it’s an engraving tip, and I have an engraving tool, so I got that out.

That one was even worse!

What to do? I wasn’t going to take it back. Not only did I have to destroy the packaging just to open it, it was the ONLY tip they had that was small enough for what I needed.

Painters tape to the rescue!

I got it on, and it was secure. Perfect!

After making a few practice passes on the piece of lilac I’d practiced the carving knives on, I started using it on the morel.

This is how it looked, immediately after I finished (and you can see the tape that allowed the tip to fit). I was really happy with this tip. It was exactly what I needed for the job. If anything, I would have gone even smaller, if I could!

While certainly better than the carving knives, it was still rather messy. Sanding it did take care of some of that.

I have sandpaper only up to 220 grit, which is adequate for the job. No way to get into the holes, though, which is okay. I wasn’t done with it.

The next step was to break out the wood burning kit. The kit has a very fine pointed tip that I used to burn inside each hole in the morel. This allowed me to also burn away any ragged bits.

Once the insides of the holes were done, I could use the side of the tool to burn the flat surfaces.

Here is how it looked, once done.

The only thing to do after this is to oil it!

Two Face decided to “help”. :-D

Here is the completed spoon.

For the mushroom, I basically poured the mineral oil over it, to get into all the crevices, then used a paper towel to apply oil to the rest. At this point, I will let it sit for a day or two, then see if it needs more oil. I’ve seen sites that recommend putting small things like spoons into a slide-lock bag with oil, making sure the air is all squeezed out, and the item is in contact with oil all over, then leaving it for several days. I might try that with future projects, but I think just a light coating of oil is adequate for this one.

I am really happy with how this turned out!

I feel much more encouraged about tackling some of the wood I’ve salvaged lately. :-) I think my next projects, though, will be spreaders.

No bowls to hollow out! :-D

The Re-Farmer

Spoon carving progress

Today, I got some really good progress on my practice carving, using the spoon blank that came with my carving kit.

Also, the basement is nice and cool. :-)

I was down to cutting the last few divots out of the morel mushroom on the end of the spoon, so that didn’t take long. I also tried to deepen the bowl of the spoon itself.

Working on the inside of the spoon is a challenge. The tip of the sloyd knife kept gouging areas I wasn’t working on. The direction the wood grain is also means that, in two spots opposite each other, the wood did not cut as well or as smoothly, leaving more gouges, no matter how carefully I tried to follow the instructions from the various videos I’d looked up for beginner carvers.

The rough shaping of the outside of the bowl and handle are… well… rough. LOL

Here is how it looked, after I finished with the carving tools. The next step, was to “cheat” and use my Dremel.

I have a Dremel engraver, which I tested out on the divots of the morel. That did not work at all, which is really what I expected. I figured it was worth a try, though.

Also, that thing is incredibly loud, and scare the crap out of the kittens and Beep Beep!!

The other Dremel I have is a basic low end rotating tool. (The engraver doesn’t rotate, so there is nothing interchangeable about them.) I used a drum sander to smooth out and shape the bowl and handle.

This also took off more of the excess wood to add more shaping.

For the details in the morel, I’m going to have to pick up a fine, abrasive tip. None of the tips that came with my kit are remotely close to being usable for this.

I decided on a swoopy handle, just for effect, but it has turned out to be a great thumb rest. It fits remarkably comfortably in the hand.

This is after sanding the spoon with three grades of sandpaper. Unfortunately, even the edges of the sandpaper tends to leave little gouges inside the spoon’s bowl.

I also had an unexpected issue to deal with, though not a surprising one. The humidity is so high in the basement, both the sandpaper and the wood itself was affected. The wood dust had a tendency to clump up. It wasn’t too much of a problem, but I think it affected how well the sandpaper was able to do the job. Some things actually work better with wet sandpaper. This is not one of them! :-D

This is now it looks after I stopped for the day. After I get a new Dremel tip to finish detailing the morel, I’ll continue to sand with finer grades of sandpaper, singe the morel to add colour, then finish with mineral oil. I did some searches on food grade oils for wood, and it basically came down to mineral oil. Other oils recommended are derived from nuts or seeds, and they go rancid over time. Beeswax is something else that can be used, but it can start cracking and flaking and, of course, you couldn’t use it with anything hot (among the things I hope to carve are cups and small bowls).

Once finished, I plan to offer it to my mother, since she requested I carve her a mushroom. Talking to her since then, it turns out she wants a Portebello (she didn’t know the English name for it), but I hope she’ll be happy with a morel for now. I know she likes morels, too. Most likely, she’ll reject it, but you never know. I might get her on one of her good days.

The Re-Farmer

ps: after finishing this, I checked the weather before heading outside. Turns out the temperatures are still going up, and we’re even hotter now, in the early evening, than before!

More Lilac Wood, in progress

Our windy day continues! While we have a few millimeters of rain predicted for this evening, as I type this, I am hearing thunder rolling, and just saw a flash of lightning out my window!

Here’s hoping we don’t loose power while I’m working on this post! :-D

I have continued working on the section of lilac wood I’d experimented on earlier. I decided to try using the cutting tool on my Dremel to make the job go faster – if the Dremel was quiet enough not to disturb Beep Beep and her babies too much.

It was quiet enough, but… there were other issues.

The Dremel I have is not a particularly powerful one. Just a Walmart cheepie, really. Lilac is a surprisingly hard wood, and it was just too much for it!

I ended up stopping part way through my attempt to cut through the wood and finished with a hand saw.

You can see where the friction actually “burned” the wood as the blade ground to a halt!

So I did the rest using a carpenter’s saw, cutting the piece into slices. It took a while, but I eventually got into the rhythm of it, and things went fairly quickly. I cut slices off until I had exactly 3 1/2 inches left – the width of my miter box – to try something different.

It fit just right, and I was able to cut the piece into 4 lengthwise sections. Not as evenly as I would have liked, since it kept trying to roll on me, but that just adds to the interest!

Here are all the pieces I got out of the section of lilac wood.

I really like how the length wise cuts look.

Also… do you notice something about the pieces?

The next step was to take a wire brush to the edges to remove loose bits of bark and clean off any debris. As I worked, I kept noticing a soft spot in the middle of the slices. I finally stopped to take a closer look, and it turned out every round piece had it, as did the centre lengthwise cut.

I used a non-metal brush on them, and eventually decided to just poke at it with a very small screwdriver.

It was basically just wood dust and came right out.

So I cleaned out every disk. Some were small enough that I had to use a wire to clear them out, but every single disk now has a hole in the centre!

I was even able to use the wire to push through the centre cut piece, then use a brush to clean up the open section.

Oh! That was a quick little storm, and I noticed some crazy orange light outside. I just dashed out to see a gorgeous double rainbow!

Also, I got rained on. *shiver*

Now, where was I?

Oh, yes.

Tomorrow, I hope to be able to get back to these and start sanding them smooth and giving them a light coat of oil.

I’m still not sure what I’ll be doing with them, but they’re going to look very pretty when they’re done.

Since all of these had the holes in them, I double checked the first two I’d done, so see if they had that soft spot, too. They did. Barely big enough to use a sewing needle to clean them out. So those two pieces now have tiny holes through them, too. The colourful rings in one of them looks very much like an eye, and now the “pupil” has a tiny hole you can see though. It’s kinda like those “fairy stones” you find at the beach, with natural holes in them. :-)

I like it!

For the size if these, I’m thinking they might make nice pendants. The rings of colour are so dramatic, I feel doing anything more than sanding and oiling them is unnecessary. A possible exception would be to perhaps put a glass bead or something like that into the ones with the larger holes.

What do you think?

The Re-Farmer

Hanging rig, finished

So… I’m a suck. Especially when it comes to the cats.

But if you have been following this blog for a while, you knew that already. ;-)

While our basement maternity ward is certainly warmer than outside, when I checked on the mamas and babies earlier today, I noticed that the babies felt a bit chilly.

Therefore, on the principle of “put on a sweater, Mom is cold”, I decided to borrow and set up the upstairs heater at the end of the basement where the newborns are. Then, I had to stay in the basement, since it’s not supposed to be left on unattended.

Which gave me the opportunity to finish the hanging rig I’d whipped together when making cheese.

I had already done some basic sanding, as well as a bit of damage repair, a couple of days ago. Having picked up some more sandpaper yesterday, I could now finish the job.

The piece with the crack I’d glued was rough enough that I actually used a rasp we found while cleaning the basement, to get the roughest parts a bit smoother. I then spent the next couple of hours working my way through sandpaper grades until all the pieces were silky smooth.

The basement got nice and warm while I was doing that. The mamas and kitties seemed to be quite content with this. :-)

Then, because I had some, I rubbed the wood with mineral oil.

If I hadn’t had any, I would have eventually picked up some type of varnish, or maybe paint, to finish it with later.

In my rush to make the rig, I’d drilled a pilot hole in the cross piece a bit off. I was going to drill a new hole, lined up with the other side, but when I measured it, the new hole would have been just too close to the existing one. So I left it. I’ll just have one leg a bit off from the other.

The final step was to reassemble it, using wood glue at the ends of the side pieces to stabilize it.

Here are the before and after pictures.

It really doesn’t look a lot different, but trust me. It is! No possibility of getting splinters anymore, for starters. :-D I’m glad I happened to have the mineral oil to treat the wood. Once the glue has cured, it will be nice and solid, too.

We’re now all set for any future preserving we do that requires hanging a bag to drain. Plus, if we had to, we could even add a couple more cup hooks to hang up to three jelly bags or something, if needed.

I’m rather pleased with how it turned out.

It doesn’t take much to make me happy. :-)

The Re-Farmer

Gathering Data: future cheese cave?

Among the many things we are interested in doing in the future is making cheese.

We already make yogurt cheese (see here and here) whenever we make yogurt, which can be used right away, but we’re interested in making cheeses that need to be aged.

Which requires a place to age them. Like a cheese cave.

Well, we do sort of have a “cave” in the basement. The old root cellar.

In the research I’ve been doing (watch out for a future “Recommended” post for a home cheese making resource!), the aging cheeses need temperatures and humidity to stay within a certain range.

I don’t know that our root cellar has that range. For starters, I think it might actually be too cold, but that can be helped with appropriate insulation. I think our greater challenge will be the humidity.

Since this is not something we’ll be able to do for quite some time, that means we have time to gather data.

Which begins today.

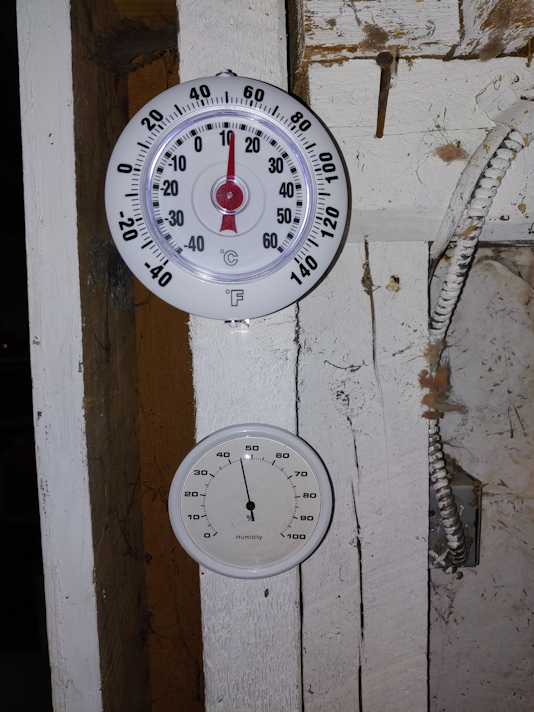
I went to pick up a cheap thermometer at the dollar store and found a hydrometer right next to it, which was great, because I didn’t even think of such a device existing. At least not in household form. These are not mounted just inside the door of the root cellar. This is probably the warmest part of the room, but the best location for hanging them. Ah, well.

As you can see, the temperature gauge had already dropped quite a bit.* The humidity is about the same as it was upstairs, so I don’t know if that was the actual reading, or if it still needed time to adjust for the new location.

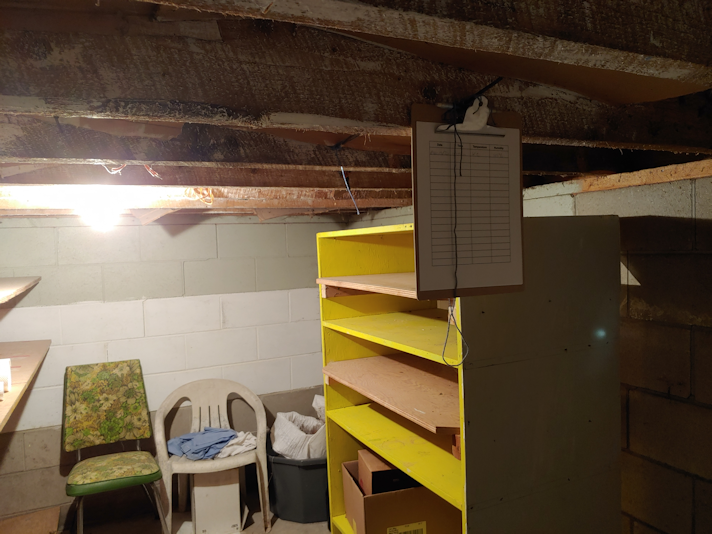
There were already huge nails hammered into the floor joists of the entry above (I’m finding nails like this all over the basements, garage, sheds, barn – anywhere there is wood, there are nails hammered in for hanging things), so I used one that was accessible, but still out of the way enough to not bash my head, for the clip board. I printed out some chart sheets to record date, time, temperature and humidity. The plan is to come down here once a week, at different times of the day, and record the gauge readings.

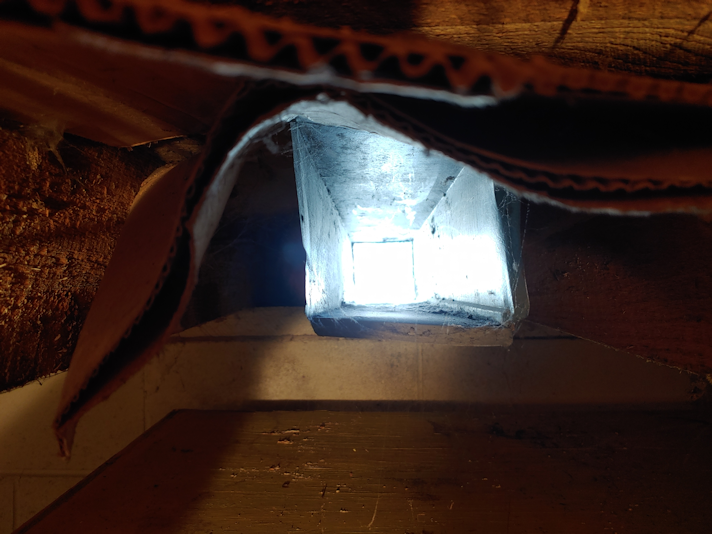
This would be why it’s so cold in here. This vent duct goes directly outside. The only thing at the end is a screen to keep the critters out. While I was down there, I felt an actual wind coming through this duct.

Over the next year, we will get the weekly readings and slowly empty the room out and give it a good cleaning. I figure, in a year we’ll be able to chart the data and use that to determine how much would need to be done to make it functional as a cheese cave, or if we have to go with something else. Like a modified refrigerator.

If the room turns out to not be appropriate as a cheese cave, I already know it works well as a root cellar. :-) So either way, it will be used in the future!

The Re-Farmer

*edit: for some reason, my brain just assumed that, like every other thermometer I’ve seen, the 0C was at the top, so when I looked at it, I saw 2C instead of 12C!! Which is a bit of a relief, because while the temperature did continue to drop, it was not as severe as I originally thought.

Recommended: Cordwood Construction

Welcome to my “Recommended” series of posts. These will be weekly – for now – posts about resources I have found over the past while that I found so excellent, I want to share them with you, my dear readers. :-) Whether or not I continue to post these, and how often they are posted, will depend on feedback. Please feel free to comment below, and if you have a favorite resource of your own, do share, and I will review them for possible future posts.

I hope you find these recommendations as useful and enjoyable as I have!

Since we decided to try our hand with some cordwood practice buildings, starting this summer with what will be an outdoor bathroom, I’ve been doing a fair bit of research. I’m learning that this building technique has had some modern changes to it that have greatly improved the final result.

One thing I found, as I did online searches, what that time and again, I kept finding myself back at one site. Cordwood Construction: The Essence of Cordwood Construction. There are many, many sites, blog posts, videos and books about the technique out there, but I’m not finding anything else more informative and practical. There is so much information at the site – even house plans! – one could easily spend many hours there. (I’m loving their post about cordwood flooring, too!) Their blog seems to be kept up quite often, too. They also have a Facebook group, bookstore and newsletter.

They do have a YouTube channel as well. There are not many of their own videos there, but if you check their playlist tab, you’ll find lots more videos.

The information they have is very hands on. I find myself wishing I could attend one of their workshops but, alas, they are too far away.

They also get right into the basic, essential details in a way that is so very helpful.

My previous experiences with cordwood (aka stackwood) construction are historical buildings, and this resource is where I first heard of using an inner layer of insulating material between outer layers of mortar. It’s also where I first encountered the notion of bottle bricks, outside of Pinterest images that led to nowhere useful.

They provide so much basic information that I really feel that someone like me, who has never built anything major before, can do it. I’ve already downloaded their shed plans ebook, and it is so very thorough! I plan to rely on it heavily, and I’m downright excited about building some practice buildings over the next couple of years. Who knows. A few years from now, we might be using the technique when it’s time to build a barrier free house for myself and my husband!

Obviously, this is a resource useful for someone who is – or hopes to be – in a position to construct their own cordwood building, but I think the technique itself is a sort of “lost art”. Given some of its many advantages, which include lower costs, being fire retardant, and more “eco-friendly”, I think this is a building method that deserves a resurgence. Resources like Cordwood Construction are a fantastic place to learn more about it, and be inspired. Of all the other sites I’ve looked at, this one is, hands down, the best of the lot!

I’m really looking forward to putting what I learn from this resource into practice, and definitely recommend this resource for anyone to check out, even if it’s just to learn more about this fascinating building method.

The Re-Farmer

A perfect fit

I made myself a hat today.

I’d made myself a ponytail hat last winter, but forgot it at the clinic during one of our doctor’s visits. No one turned it in to the lost and found. I finally got around to making a new one. :-)

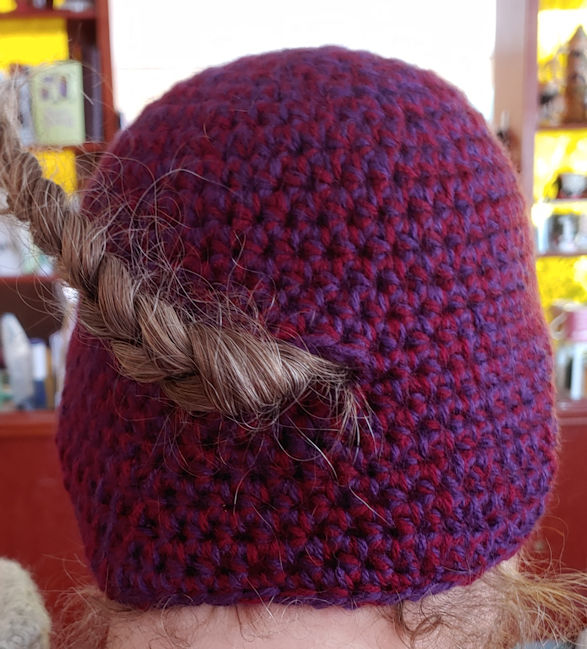
I used two strands of medium weight yarn and a 6mm hook. The main body of the hat is just half-double (hdc; known as a half-treble in the UK) worked in a spiral. To figure out where to put the opening, I just kept putting it on my head until it was long enough to reach where I usually wear my braid, then did a chain 4, skip 4 stitches to make the opening.

Warm hats are, of course, a necessity for this time of year, but most hats irritate the heck out of me. If they’re long enough to cover my ears, they get into my eyes, and every time I move my head, the back of my hat gets pushed up. My ears get uncovered and the hat gets pushed into my eyes. My long hair, of course, also gets in the way of having it sit right on my head.

The joy of making my own hats, is that I can figure out how to work around that.

Along with the opening to pull my braid through (which then helps keep the hat in place), after a few more rounds, I switched from hdc in the back to dc (double crochet, or treble/triple crochet in the UK) on the sides, and sc (single crochet, or double crochet in the UK) across the front. The end result is a wavy edge with longer sides that snuggle warmly around my ears, while the slightly shorter back doesn’t get pushed up when I move my head around, and the even shorter front doesn’t get into my eyes, but it still long enough to keep my forehead warm.

I probably should have done this at the start of winter, rather than the end, but it’ll do the job just fine! :-D

The Re-Farmer

Mead Baby, redux

Today, we started up a second – smaller – batch of mead.

I hope.

I documented our first attempt, throughout the process, which you can revisit at the following links (they will open new tabs, so you won’t lose your place. :-) )

Part 1 getting started
Part 2 early stage maintenance
Part 3 early stage maintenance, completion
Part 4 transferring for second fermentation
Part 5 bottling and initial results

The Failure. :-(

Continue reading