So I am chatting with Re-farmer, old school on 2 landline phones. She has asked me to let you all know that her internet is not connecting with the rest of the world. A healthy, leafy tree is in the way! It will be a day or two to fix, and thought she would let you know she didn’t fall into the outhouse! So she will post as her connection gets fixed or when she goes into town for free wifi! Signing off, The City Mouse
Uncategorized

Just a bit of a prune…
In my last post, I mentioned how we were having connectivity troubles with our satellite internet, due to heave foliage.
It’s very windy today.
Since we switched cables on accounts, we’ve had constant interruptions in service, to the point that my daughter was having difficulties working.
I’d gone outside to use up more of the rain barrel’s water around the yard when the girls came out to take a good hard look at the tree situation.
The satellites are aimed through a gap between two trees. A gap that is mostly filled with leaves right now.
The question was, should we prune?
It came down to a particular branch on one of the elms beside the small gate in the chain link fence.
Now, I’ll be straight about the pair of trees on either side of this gate. I would love for them to be gone. They were planted in a poor location, and their roots are currently pushing up the sidewalk blocks. My ideal plan would be to remove both trees, pull up their stumps, and lay down a new, wider, properly installed sidewalk that would better accommodate my husband’s walker. That is a HUGE job we are in no position to do for many years yet, if at all.
I’m pretty sure that when the current sidewalk was installed, the pavers were just laid down on the grass, and then some dirt was thrown up against the sides so the lawn mower could go over them. I think the paving stones forming a small patio under the kitchen window were install much the same way. Those ones are being lifted and shifted by the roots of the elm tree in front of the kitchen window; another problem tree.
I understand why my mother planted them. They provide excellent shade. The problem is, she didn’t think far enough ahead when she chose the locations. Now, the one by the kitchen is a problem for the roof, as well as the patio blocks and the basement wall. The ones by the small gate in the chain link fence were planted too close together, never mind the sidewalk running between them.
So these are trees that have many issues.
In the end, it was these many issues that had us agreeing to prune away one of the major branches growing towards the house.
That, and they’re elms. We could cut them down to stumps, and they’d grow back. The one in front of the old kitchen had already been cut back significantly, leaving behind a flat top the yard cats now use to hang out on. :-D
I didn’t have my phone with me, so I have no before pictures, but this is how it is now.
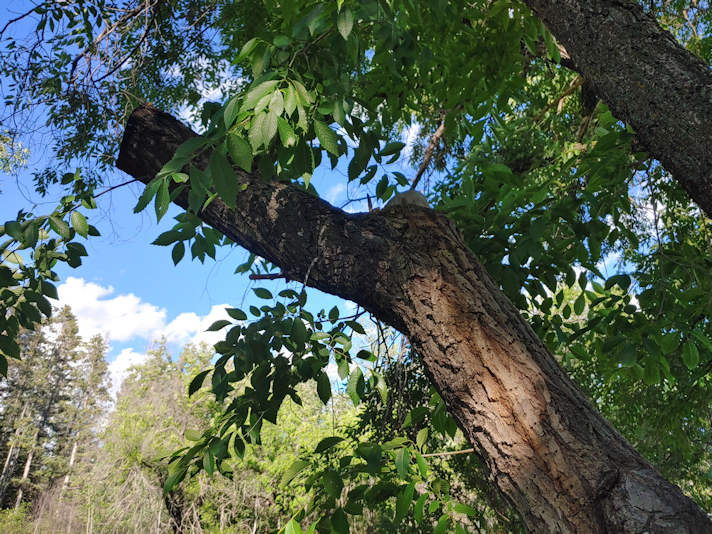
As you can see, this is not the first time this branch has been pruned!
This was also our first opportunity to use the pruning paint I found, which is black, so it’s not easy to see in the photo.
The girls had started off using the long handled pruning saw to cut it, but it started to jam. I ended up bringing over the step ladder and a buck saw. Once up there, I could see that where they’d started cutting had a huge knot, out of sight from below! So I started cutting a few inches away. We never did have to cut all the way through; the weight of the branch itself started breaking it, long before. One of my daughters grabbed it with the hook on the long handled pruning saw and was able to pull it the rest of the way down. After that, it was just a matter of cutting it free from the tree, which required one daughter to lift the weight of the main branch while the other did the cutting.
Once it was on the ground, I was able to go at it with the reciprocating saw and cut it into manageable sized pieces for hauling away.
Except for the main body. We set that aside for now.

We were thinking of the possibility of my using parts of it for carving, but I don’t think that will be possible.


It looks like the core of this branch was already rotting away! I think I even see insect damage.
Which means, if we hadn’t taken it down now, it may well have broken in high winds, like branches in the tree in front of the kitchen window already have. Well, that’s a likelihood for any of the trees. The rot just made this one a higher risk.

You can just see the black end of the branch we cut in this photo.
You can also see some of the many dead branches above it.

In this photo, you can see part of the elm tree on the other side of the gate, on the right side of the photo. Lots more dead branches, all out of reach.
Taking this branch down has opened up the yard quite a lot! I remember getting that same feeling of openness when I cut away the broken branches in the elm by the house (on the left edge of the photo, you can see part of a branch from that tree). We still have plenty of shade, too.
In the end, I’m glad we got it done. Whether or not it reduces how often our internet cuts out (which happened again while I was writing this, but only once, rather than the 3 or 4 times when I wrote my last post), we will see. For now, though, we got the one branch done, and will hopefully find a way to get at the dead ones, too. I’d really rather not wait for storms to bring them down, if I can!
The Re-Farmer
Share this:

A wonderful surprise!
I know I’ve said this before. I’ll probably say it many more times.
I have the best brother!
He and his wife are just amazing. Yesterday, we had a wonderful surprise from them. I got a message from my SIL that my brother would be coming over with their old dog house, for us to use as a cat shelter!
They have always had large dogs. When their last one passed away, they decided not to get another dog. With a new grand child in another province, and prospects of retirement and selling the property in the future, it just wasn’t something they wanted to do.
This left them with a large dog house in their yard that wasn’t being used.
And they know we’ve been using the sun room to provide shelter for the cats over the winter, leaving the doors propped open slightly.
What they didn’t know is that we were looking into building a larger shelter with a roof that could be lifted up, for easy access and cleaning.
Their dog house not only has such a roof, but it’s wired for electricity!
My brother, saint that he is, ended up taking several hours not only to move the heavy shelter (using tools like a come-along, and good old physics!) onto their trailer – something my SIL could not help with at all, having had surgery not long ago – but to replace part of the roof and paint it, too!
Just look at this thing!

He even brought the pallets that were under it.
With three of us working together, we got it unloaded and set up in only a couple of hours. We had to set up a fence post, at an almost 45 degree angle, to have something to attach a chain for the come-along to. The shelter itself is on top of a skid. Once that reached the edge of the trailer, my brother and I levered up the ends of the skid to go over the lip and clear the board he’d put on the ramps. The ramps were designed for wheels, with recesses in the middle to prevent them from going sideways. The skid would have fallen right into those, but he had boards wide enough to fit right in there.
The chain for the come-along had to be adjusted a couple of times before the shelter was at the end of the ramps, but at that point, the fence post was now in the way. My brother unhitched the truck from the trailer and, while I removed the post, drove the truck around to the other side and used it to pull the shelter off the rest of the way. He then had to move the trailer out, back the truck up to where the trailer was, then haul the shelter to where we had decided it should go.
Which is pretty much where one of the old doghouses, now set up near the outhouse, used to be!
There were three possible places we could put the shelter, and have easy access to an outlet. There’s the outlet on the side of the house, but with the fancy lilacs and cherry trees right there, that wasn’t really an option. We could have put it near the back of the garage, but it gets very wet there when the snow melts. So that brought us to the spot in front of the sun room. We should be able to run a cord through, and still close the doors, in the winter.

Check it out!
You can see an outlet that the light it plugged into. The light has a pool-grade cover over it, so nothing it getting at that bulb. It’s a 100 watt bulb, so it will also provide a bit of warmth. There is a second outlet just on the other side of where the cord goes through the wall. They had had a pet safe warming blanket plugged into there. My brother tested them out before bringing it over, and it all works. We will be able to plug in the heated water bowl in there. It has a long enough cord to be plugged in and still be outside.
The main part of the doghouse turned out to be too small for when they had two dogs, so my brother added the “porch” at the end – which now has a fresh new roof. The flax inside was still clean, so they left that.
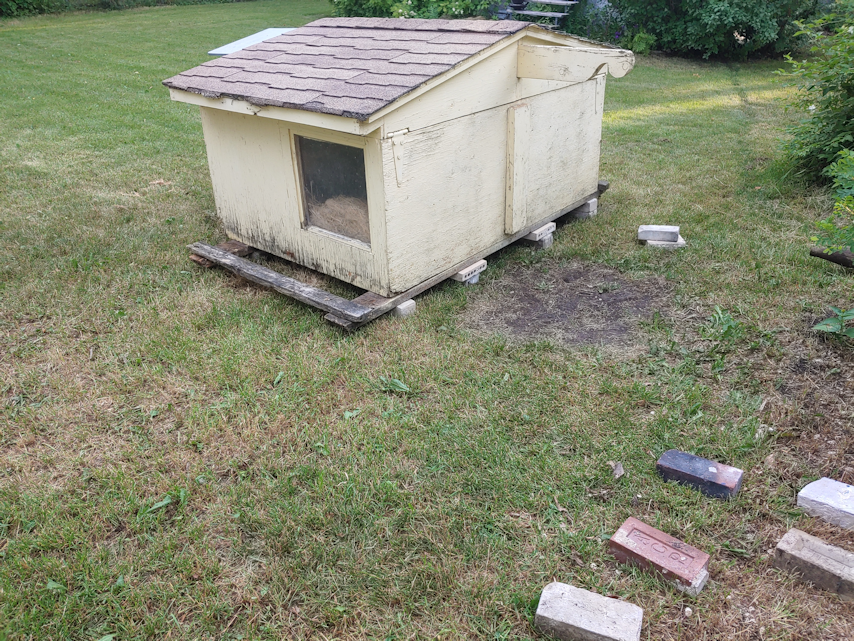
Though my brother brought the pallets it was on, I wanted it on bricks. I’ve cleaned up way too many rotten pallets to go with wood directly on the ground again! And we just happened to have a stack of bricks I’d cleaned up from various places that we could use.
We will continue to add bricks for both support, and to level the shelter more. You can see the patch of dirt where the previous doghouse had been sitting. We went further out, where the ground was more level, but it’s still not flat.
Do you see that beam sticking out, with the decorative cut at the end?
The roof of this is very heavy, and my brother had included this with the thought to add a counter weight, or maybe a spring – anything to make it easier to open the roof up. He never got around to adding anything, though. It’s something we might do. Or not. We’ll see.

With the skid under the main body of the doghouse, the “porch” just sort of floats above ground. The top is starting to pull away from the main section, though – despite the many deck screws holding it in place! – so I intend to add bricks to support that, too.
There are two layers of shredded carpet over the opening to keep the weather out, while still letting critters in.
The skid is starting to look kinda rotten, even though it had always been on top of pallets, not directly on the ground, and I find myself looking at it and thinking…
Is that about the same size as the long frames we made for the goat catcher? If I cut the ends at an angle, one of those would make a very strong replacement skid!
Switching those out would be a huge job, but it would be worth it.
Aside from little things like that, and some minor repairs to old wood, we are now set for a winter shelter for the yard cats! One with warmth and light.
I hope the cats enjoy it!
On a completely different note, while going around and deciding where best to put the shelter, I decided to dig out the hose attachments and fertilizer and give our garden beds a good feeding. I was moving the hose at the front of the house, so I could reach the carrots and beets, when I suddenly lost water.

The hose end snapped off, right at the tap!
I hadn’t even pulled on it. The hose was just moving. It’s designed to rotate freely, and you can see the piece that was there to keep it from bending.
I bought this hose last fall. It’s less than a year old, and has seen hardly any use!
The more inconvenient part, though, is that the tap at the front of the house needs a new seal. We can’t turn it off, because it just sprays at the tap. Which meant that, when I discovered what happened, there was water flowing at full pressure right at the house, and while shutting the tap off did slow it a bit, I still had to yell for a daughter to dash into the basement and shut the water off from there. Thankfully, the pipes to the outside taps do have their own shut off valves, unlike the pipes supplying water inside the house.
A couple more things to add to the fix-it list!
For now, however, it’s time to shut down the computer. I’m seeing thunderstorm warnings flashing on my task bar! I expect the storms to miss us again, but we’ll likely loose internet, and possibly get power flickers, too.
That, and my daughters are taking me into town to pick up Chinese food for my birthday. They are so sweet! :-)
The Re-Farmer
Share this:

Well, that sucks… and why is that there?
Not too long ago, I wrote about my daughters installing a new kitchen faucet. One of the issues was, we have no shut off valves. There is one main shut off valve that shuts off water to the entire house.
Today, that became a problem.
One of my daughters had gone into the basement to clean out the litter boxes, when she discovered water dripping from the cold water pipe leading to the kitchen sink.
No, the pipe was not leaking. The water was coming from above, and from the damp state of the floorboards above, it had been leaking a while.
My younger daughter started clearing out under the sink to see what was going on, while her sister and I started cleaning up in the basement.
Suddenly, the drip started dripping even faster!
Which is when the water for the house had to be shut off.
My daughter had tried to tighten the flexible pipe between the copper pipe and the tap, and it started spraying all over.
Did I mention there are no shut off valves for the sink?
It ended up falling apart, and try as they might, the girls couldn’t even rig something up to hold overnight, so we could turn the water back on.
While they were fighting with that, I went hunting in the basements. There are so many parts and pieces around, surely there must be something we could use to at least plug the pipe, so we could turn the water back on?
When we were cleaning out the basement, some things never made it to the barn. Including a box I’d shoved under the stairs. It’s full of parts and pieces of taps and faucets and pipes…

… and balls, and parts of shower heads that have never been used, and other unidentifiable things.
I also found this.

Actually, I found the box with an eyedropper and what appears to be the instruction sheet inside. I found the bottle that should have been in it, buried in the bottom of the box.

You’d think, by now, I’d no longer be surprised by the things I find in the strangest of places, but … really. Why? Why was this here??
I’ve since tucked it into a place the cats and kittens can’t get into.
Meanwhile, the girls were able to seal up the top of the cold water pipe in the kitchen, allowing us to turn the water back on to the house.
Tomorrow, I’m off to the hardware store, as soon as it opens!
I figure, we may as well replace both of the flexible hoses, which I’ve seen in kits for both hot and cold water.
And maybe get some shut off valves, too.
The Re-Farmer
Share this:

New stove is in!
Okay, I am beyond excited right now!
The new stove is in, and it’s absolutely fabulous!!
Yes, it did also take a couple of hours to get it done, but not for why you might think.
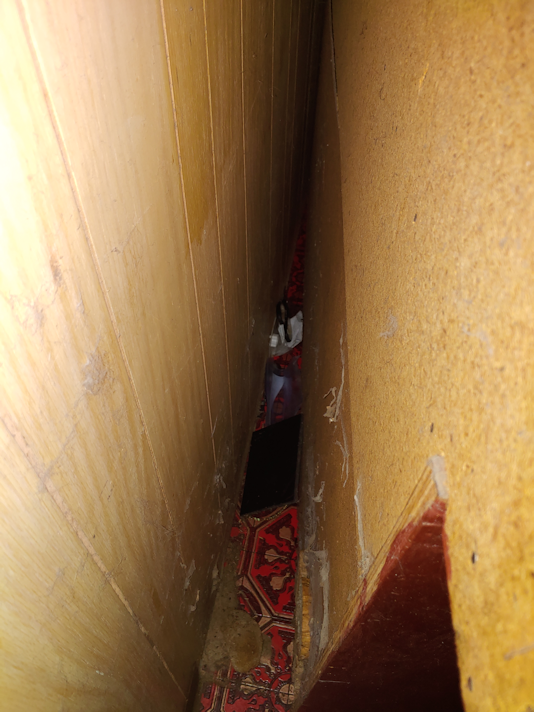
First off, moving the counter turned out to be a lot easier than I feared. Once I moved the dining table as far into the corner as I could, I had enough space that I would not have to move any other shelves.
Once the drawers, which held most of the weight (especially the cutlery drawer!) were removed, I also found I didn’t need to empty the cupboards, either. Once I got the counter unstuck from where it has been sitting for so many years, there were no issues.
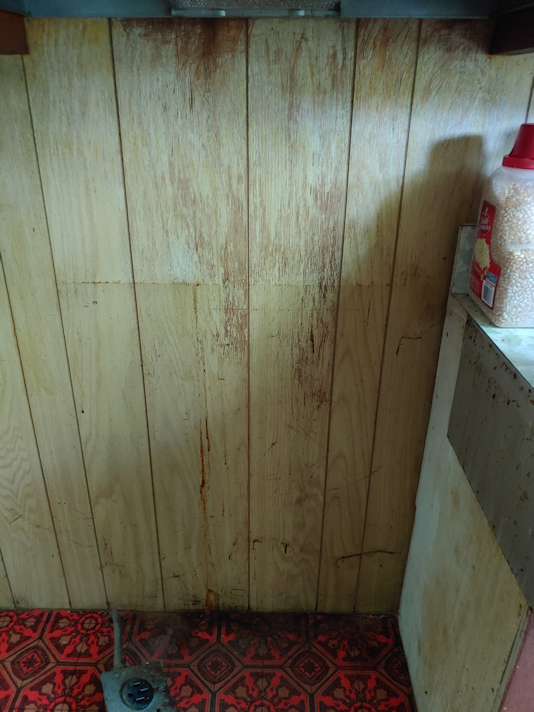
I admit, it was a lot less disgusting back there than I feared.
Also, yes. That’s a piece of toast on the floor.
Oh, dear God. I just realized.
There’s another piece of toast stuck to the back of the counter.
I have just returned from pulling the counter away from the wall and cleaning it out.
Those would predate our moving here. In fact, they probably go back to before my dad had to move to the nursing home. Which means they’ve been there for probably more than 5 years.
And yeah… it’s still actually less disgusting than I feared.
There were a couple of things I expected to find, since I was there when they fell behind the counter. I did not expect to find a new jelly bag.
I was wondering what happened to the second one from the package…
Then there was this.

This would go back to before my mom moved to the senior’s apartment she lives in now, so it’s probably been there for more than 6 years.
The counter itself turned out to be remarkably easy to move. It didn’t even catch on anything in the process.
Then it was time to shut off the breaker and move the old stove.

What the flash in the photo picks up, that I couldn’t see when I went to move the power cord, is that grease had dripped behind the stove, onto the cord.
That was really gross to handle. I couldn’t even put on the disposable gloves we would normally use. It’s so hot and sticky, I wouldn’t be able to pull them on. So I used paper towel to handle things.
Things were so sticky back there, it took more effort than it should have, to unplug the old stove.
*shudder*
Once the stove was clear, I peeled off the self-adhesive shelf liner that was used as a backsplash.
Then I was done. It may not have been a lot of actual physical labor to most things around – I easily did it by myself – but by this point, I was absolutely dripping with sweat.
The girls then took over and did the hard part.
Cleaning.
Those two are absolute saints.


That floor is just … wow. The difference between the part worn out from decades of feet, and the part under the counter, could not be more dramatic!
Clean up done, the girls got to use the time needed for everything to dry, to cool down and stop sweating. Then they put up the self-adhesive backsplash.
Then we finally unpacked the new stove from it’s box. After measuring the other counter, we found we did not need to adjust the legs – at least not before we put it in place. The daughter that was trapped in the kitchen used a level on the floor, and it definitely sloped downwards, away from the wall.
The height of the stove, without adjusting the legs, was exactly the same as the height of the counter, but a sloping floor would have to be accounted for. First, we had to plug it in and get it in place.

Here, you can see how the 4 pieces of self-adhesive tiles were placed for the backsplash. We will get a couple more and fill in the gaps, later.
Then one of my daughters was an angel and sprawled on the floor while her sister and I tipped the stove flat against the wall.
Which made it perfectly level!
I guess it’s good to know our walls are straight, if not our floors… :-D
That made it a lot easier for my daughter to adjust the leveling legs.

No more food sloshing to one side of the pot or pan when we cook, now!
Once everything was in place, back went the counter.
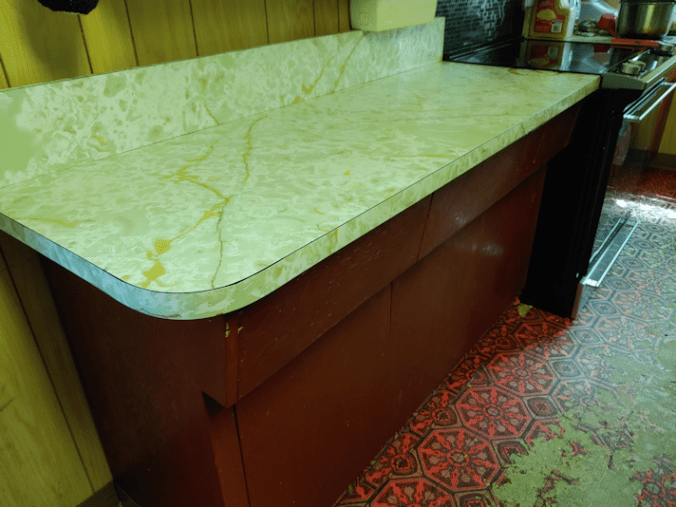
The new stove is the same width as the old one, but deeper, so it sticks out further than the other one did.
It also has a much larger oven, so we’re very good with this!

It’s going to take some getting used to having the controls in front.
Once the breaker was turned back on, the girls figured out how to set the time, using the 24 hour clock setting. Then they tested out the cooktop.
We are just entranced. I don’t think we’ve ever had anything so nice and new before. It heats up so quickly, it’s mind blowing! The larger front cook surfaces have two sides to their controllers. Use one side, it heats the full circle. Us the other, and it heats a smaller circle.
It also has no element in the oven, and the self-cleaning function is a safer, less power consuming, technological upgrade. We’ve had self cleaning ovens before, and never used them. This one, I actually will!
Best of all – no more sparks!
I am so glad this is finally done, and so thrilled with the stove itself.
Next thing on the list: replacing the taps and faucet in the kitchen sink. :-)
I’m really, really hoping someone installed shut off valves under the sink at some point. I’d really prefer not to have to shut off water to the entire house, just to work on the kitchen sink! :-D Not that I’ll have anything to do with replacing that. A much more able-bodied daughter is going to have to crawl under the sink. :-D I actually went back to pictures I took from the last time we had to go under there, when the drain on one of the sinks broke apart. None of them show enough that I can actually say for sure, and we can’t remember. We don’t really use the cupboards under the counter the sink is in. Only one drawer and one cupboard at the end is actually positioned in a usable space.
Well, we’ll find out soon enough.
Until then, we’re just going to try not to melt away.
The Re-Farmer
Share this:

Coping with the heat: building a screen “door”
Our current heat wave continues.

At 5pm, we reached 28C/82F with a humidex of 34C/93F, and we continue to get warnings for heat, flash floods and high water. Looking at the weather radar, however, it doesn’t look like the storms will hit us. We’ll be lucky to get rain. Usually, these systems come in from the North West, dip to the South of us, then get pushed back north to the East of us. Sometimes, they pass to the West of us. This time, there seems to be strong enough winds coming from the Southeast to actually push the system back to the Northwest of us!
The long range forecasts are not showing much relief, either. We’re looking to stay in the mid to high 20’s for the next two weeks. The only relief is that the lows are finally dropping to the mid to high teens, instead of staying in the 20’s, as they have been lately.
With this house, typically the basements stay cool, the main floor gets warm, while the second floor gets insanely hot. With the temperatures being so consistently hot, even the basements are starting to get warmer, though they are still significantly better than the rest of the house. The upstairs is getting unbearable. My daughter just had to stop working and shut down her computer, because it was over heating.
Normally, to help keep the house cool, the basement doors would be left open. With needing to keep the cats out of the old part basement completely, and keep the kittens in the new part basement, we have not been able to do this.
Last year, we used my daughter’s grid wall to act as a barrier in front of the old part basement door. The doorway is wider than a panel of grid wall, so we had two of them hooked together, at an angle. It did the job, but was very much in the way.
Today, I decided to do something about that.

After finishing my rounds this morning, I went into a shed not far from the barn, where I’d found some wood that was still in good shape. Some of them had 3″ deck screws in them, so I left those behind (though I did end up with a couple that had a screw at one end that I’d missed). The little wagon was great for bringing the pile over. :-)
Earlier, I’d also cleared away and hosed down the patio blocks in front of our kitchen window.
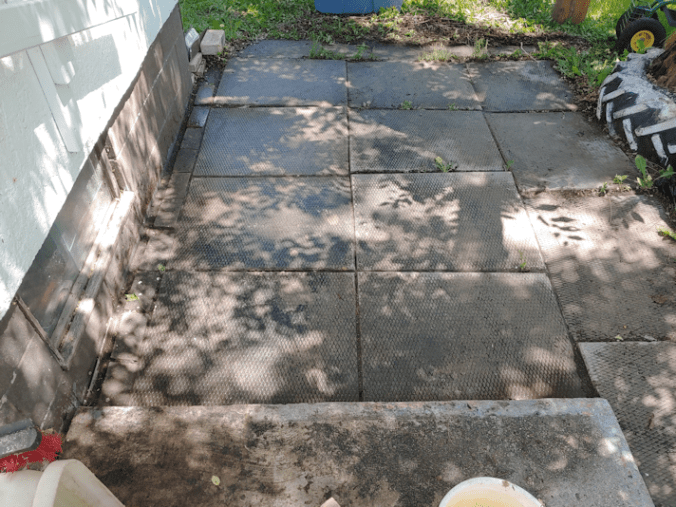
One of the things we need to do is build some sort of bin for our garbage bags, because the skunks are tearing them apart when we put them outside. Normally, there is a bench against the wall, and some other stuff, but when I cleaned up the mess and saw the gunk from however many times this has happened, left behind, I just had to hose it all down.
This meant we had access to the basement window.
It was much easier to pass the wood through the window, rather than trying to get it in through the main doors, then the basement door, then down the stairs.
All while dodging cats and kittens.
So this worked out very well.
I had enough of the wire mesh we’d used to make a divider between the basements, to make wire mesh door.

The kittens were very … helpful. Yeah. That’s it. :-D
I measured the basement door and sized it to match that. We were considering taking the door off its hinges and putting in the screen instead.
Of course, it didn’t quite work out that way.
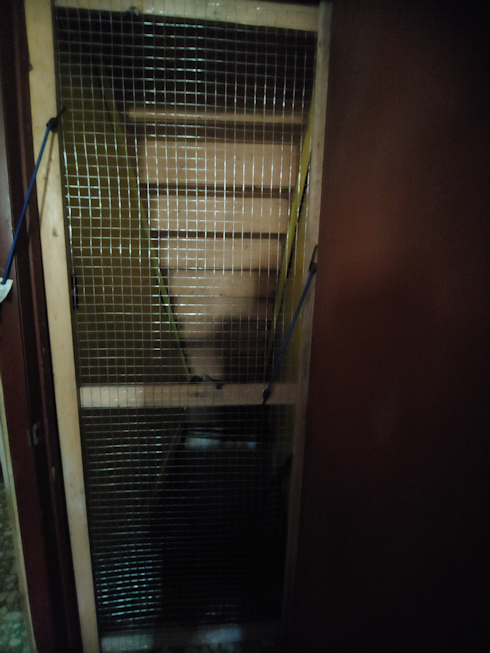
I had also considered putting it on hinges on the inside of the door frame, but it turns out the frame is narrower on the basement side of the door jam than on the door side.
Which makes no sense, but at this point, we’re pretty used to things not making sense in this house! :-D
For now, we’ve got it rigged up with hooks and Bungee cords. I will be going into town tomorrow, and am thinking of stopping at a hardware store and seeing what they’ve got that would work.
Personally, standing in front of it, I felt nothing. We have the big blower fan going constantly in this basement, trying to keep the floor relatively dry, but I felt no air movement at all. Later, my husband went by and said he could feel a cool breeze, so I’m hoping it was just me.
If we can work out how to secure this, so that cats can’t push their way through, I have enough of the wire mesh left to make another one for the other basement door. We could even hinge it to open into the entryway, instead of over the basement stairs. Which would be so much better!
It isn’t much, but every little bit helps to cope with this heat!
One of these years, I hope to get an actual air conditioner installed.
The Re-Farmer
Share this:

Wood carving: lilac wood hair pin
I am actually not sure I would even call making this hair pin “carving”! I used the natural shape of the piece of wood, and just sort of whittled away a bit. The wood was already very close to the size needed.
I didn’t take a “before” picture, but you can see what the branch I’d cut the piece from in this photo.
It’s being grasped by Nicco. :-)
Though the wood is from a branch that broke off in a storm more than 6 months ago, the bark was surprisingly green as I whittled it off. I think the humidity in the basement might actually have something to do with that.
Here is the finished hair pin, before oiling.


I cut the piece above where it branched off, to take advantage of the angled shape. You can see near the point, where there had been another bit of twig growing out.
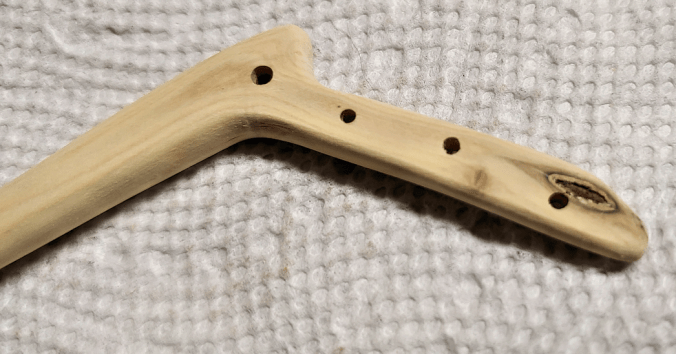
I used the Dremel and the engraving tip to create the holes, so my daughter can use them to hang dangle-y bits. The natural hole at the end was where another twig had been growing out, and I included it, without trying to sand out the roughness, just for interest.
The tiny knots from the twigs where the only thing that made it more difficult to work on.
After general shaping with a carving knife, I used the tiny engraving tip on the Dremel to make the holes, and a small drum sander tip to get into the bends, where it was more difficult to safely get into with a knife. After that, it was must a matter of sanding it smooth.
Here is how it looked after oiling.


I love how the oil brings out the details in the rings.
The whole thing, including time spent playing with kittens instead, took about 2 hours.
My daughter loves it!
I’m really happy with how this turned out, and how quick it was to make! I hadn’t thought of making hair pins (which can also be used as shawl pins), but they are prefect for some of the smaller pieces of branches. I think I’ll be making more of these!
The Re-Farmer
Share this:

Almost there!
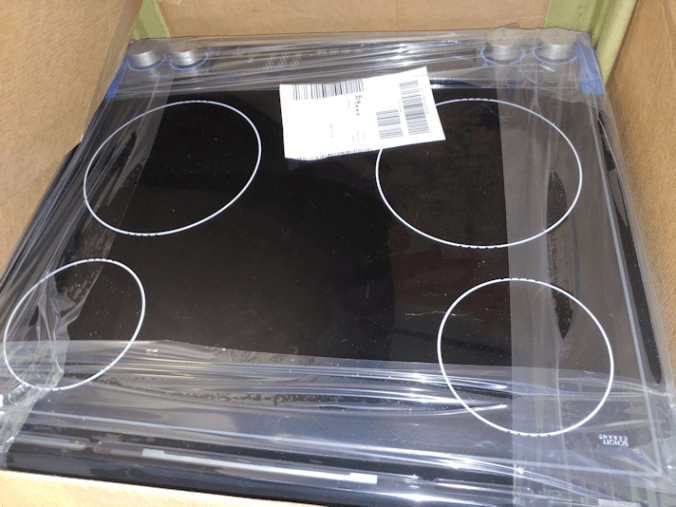
I am happy to say that, thanks to my awesome, awesome daughter (and an amazing sale at Ikea), we have a new stove!
Still in it’s box, but we’ve got it! :-D
Before heading out this morning, I measured the old stove. We’re not too concerned about the dimensions, as the counters along that wall can be moved, if necessary. The main issue is actually the space between one counter along the wall, and the island counter the sink is part of.
I also emptied the drawer under the oven – something I have been avoiding since we moved here – and took it out to see what was there.
Besides a couple of toy mice, and the missing tube of After Bite.
And Cheddar. I had to sweep Cheddar out of the space! LOL

I missed a couple of things.
Also, that’s a tiny walrus that used to be among the many critters I had decorating the dash of our previous van. I don’t know how the cats got it under there!
Once we got the measurements, my younger daughter and I headed into the city, with Ikea being our first stop. We’d checked online the night before, and according to their listed inventory, we had two options, and the one we preferred had only 2 left in stock.
By the time we got there, found the displays and talked to a salesperson to check, there was only one left!
My daughter snagged it.
Now, on its own, the stove would have fit in our van, no problem. In its box, however, it was too tall, so it had to be loaded in on a side. Which is fine. The installation instructions that were available online included doing things like laying it down to remove the packaging on the bottom, and to adjust the leveling legs, so we knew that would be okay.
After that was loaded up and we went for breakfast… er… lunch… we headed to a hardware store. The new stove has the controls in the front, not the back, so my daughter wanted to pick up a self-adhesive backsplash. While we were there, I also found a new taps and faucet set for our kitchen sink. What was merely a drip when we first moved here is almost a constant stream. My daughters had opened it up, but could not see why it was dripping. The faucet is one that tends to get in the way when we want to wash our bigger pots, so I made sure to get one with a faucet of a different design.
That done, we made a quick stop at the pet store so I could get some more plants for our fish tank, then hit the grocery store, to get the last items we didn’t get after our big Costco trip, yesterday.
After several hours of running around the city, we could finally start home, with only a stop at the gas station, so I could fill a jerry can for our lawn mowers.
Once at home and all the groceries were in, we had to get that stove inside. My daughter and I managed to wrestle it out of the van and up the 2 steps in front of the main door, but then we had a problem.
The box was just narrow enough to fit through the doorway. Perfect, right?
Well. Except for the arm bar.
My other daughter put me on cat duty with the spray bottle, then the two of them tipped it on its side again, the wrestled it through. It was a really tight fit, but the hardest part was squeezing it through the door, while also lifting it over the bottom of the door frame, at the same time.
So here it is!
So excited!
We are not, however, installing it today.
It is about 3 inches too wide to fit into the kitchen. We are going to have to move the counter out and into the dining room.
Which will require moving the dining table into a corner, move shelves we have under the dining room window, pull the counter out (which will give me a chance to finally clean back there, and reclaim some stuff that has fallen behind it), take out the old stove, clean under that, put in the new stove, put the counter back again, then haul the old stove to the pile of stuff that we’ll most likely have to hire someone to haul to the dump for us.
This is going to be a huge job.
Until then, we can use the old stove to make supper! :-)
Oh, and the new faucet and taps will be installed tomorrow, too!
It’s going to be a huge job, but I am so looking forward to not having to use the old busted up stuff anymore!!!
My daughters are awesome.
The Re-Farmer
Share this:

Carving progress: it’s finished!
I am happy to say that I have finally finished my first attempt at carving!
Yay!
My trip into town was successful, in that I found a teeny tiny tip for my Dremel.

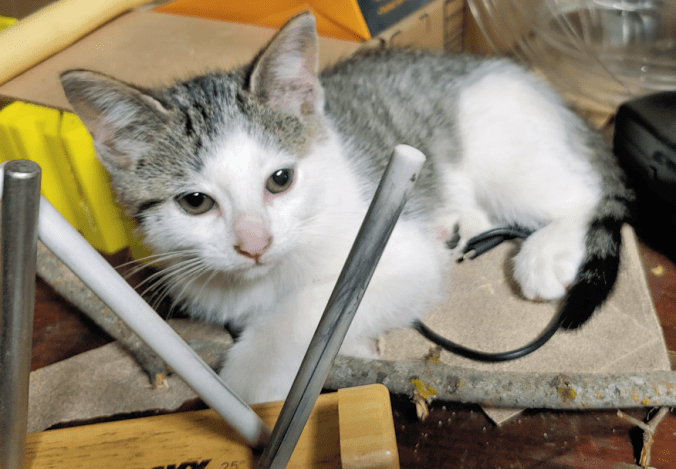
Saffron made sure to check it out, too!
I discovered something when I went to put it on my Dremel, though.
It didn’t fit.
The shaft is too small. By maybe a millimeter!
Well, it’s an engraving tip, and I have an engraving tool, so I got that out.
That one was even worse!
What to do? I wasn’t going to take it back. Not only did I have to destroy the packaging just to open it, it was the ONLY tip they had that was small enough for what I needed.
Painters tape to the rescue!

I got it on, and it was secure. Perfect!
After making a few practice passes on the piece of lilac I’d practiced the carving knives on, I started using it on the morel.

This is how it looked, immediately after I finished (and you can see the tape that allowed the tip to fit). I was really happy with this tip. It was exactly what I needed for the job. If anything, I would have gone even smaller, if I could!
While certainly better than the carving knives, it was still rather messy. Sanding it did take care of some of that.

I have sandpaper only up to 220 grit, which is adequate for the job. No way to get into the holes, though, which is okay. I wasn’t done with it.
The next step was to break out the wood burning kit. The kit has a very fine pointed tip that I used to burn inside each hole in the morel. This allowed me to also burn away any ragged bits.

Once the insides of the holes were done, I could use the side of the tool to burn the flat surfaces.
Here is how it looked, once done.


The only thing to do after this is to oil it!

Two Face decided to “help”. :-D
Here is the completed spoon.


For the mushroom, I basically poured the mineral oil over it, to get into all the crevices, then used a paper towel to apply oil to the rest. At this point, I will let it sit for a day or two, then see if it needs more oil. I’ve seen sites that recommend putting small things like spoons into a slide-lock bag with oil, making sure the air is all squeezed out, and the item is in contact with oil all over, then leaving it for several days. I might try that with future projects, but I think just a light coating of oil is adequate for this one.
I am really happy with how this turned out!
I feel much more encouraged about tackling some of the wood I’ve salvaged lately. :-) I think my next projects, though, will be spreaders.
No bowls to hollow out! :-D
The Re-Farmer
Share this:

Spoon carving progress
Today, I got some really good progress on my practice carving, using the spoon blank that came with my carving kit.
Also, the basement is nice and cool. :-)
I was down to cutting the last few divots out of the morel mushroom on the end of the spoon, so that didn’t take long. I also tried to deepen the bowl of the spoon itself.

Working on the inside of the spoon is a challenge. The tip of the sloyd knife kept gouging areas I wasn’t working on. The direction the wood grain is also means that, in two spots opposite each other, the wood did not cut as well or as smoothly, leaving more gouges, no matter how carefully I tried to follow the instructions from the various videos I’d looked up for beginner carvers.

The rough shaping of the outside of the bowl and handle are… well… rough. LOL

Here is how it looked, after I finished with the carving tools. The next step, was to “cheat” and use my Dremel.
I have a Dremel engraver, which I tested out on the divots of the morel. That did not work at all, which is really what I expected. I figured it was worth a try, though.
Also, that thing is incredibly loud, and scare the crap out of the kittens and Beep Beep!!
The other Dremel I have is a basic low end rotating tool. (The engraver doesn’t rotate, so there is nothing interchangeable about them.) I used a drum sander to smooth out and shape the bowl and handle.

This also took off more of the excess wood to add more shaping.
For the details in the morel, I’m going to have to pick up a fine, abrasive tip. None of the tips that came with my kit are remotely close to being usable for this.

I decided on a swoopy handle, just for effect, but it has turned out to be a great thumb rest. It fits remarkably comfortably in the hand.

This is after sanding the spoon with three grades of sandpaper. Unfortunately, even the edges of the sandpaper tends to leave little gouges inside the spoon’s bowl.
I also had an unexpected issue to deal with, though not a surprising one. The humidity is so high in the basement, both the sandpaper and the wood itself was affected. The wood dust had a tendency to clump up. It wasn’t too much of a problem, but I think it affected how well the sandpaper was able to do the job. Some things actually work better with wet sandpaper. This is not one of them! :-D

This is now it looks after I stopped for the day. After I get a new Dremel tip to finish detailing the morel, I’ll continue to sand with finer grades of sandpaper, singe the morel to add colour, then finish with mineral oil. I did some searches on food grade oils for wood, and it basically came down to mineral oil. Other oils recommended are derived from nuts or seeds, and they go rancid over time. Beeswax is something else that can be used, but it can start cracking and flaking and, of course, you couldn’t use it with anything hot (among the things I hope to carve are cups and small bowls).
Once finished, I plan to offer it to my mother, since she requested I carve her a mushroom. Talking to her since then, it turns out she wants a Portebello (she didn’t know the English name for it), but I hope she’ll be happy with a morel for now. I know she likes morels, too. Most likely, she’ll reject it, but you never know. I might get her on one of her good days.
The Re-Farmer
ps: after finishing this, I checked the weather before heading outside. Turns out the temperatures are still going up, and we’re even hotter now, in the early evening, than before!

